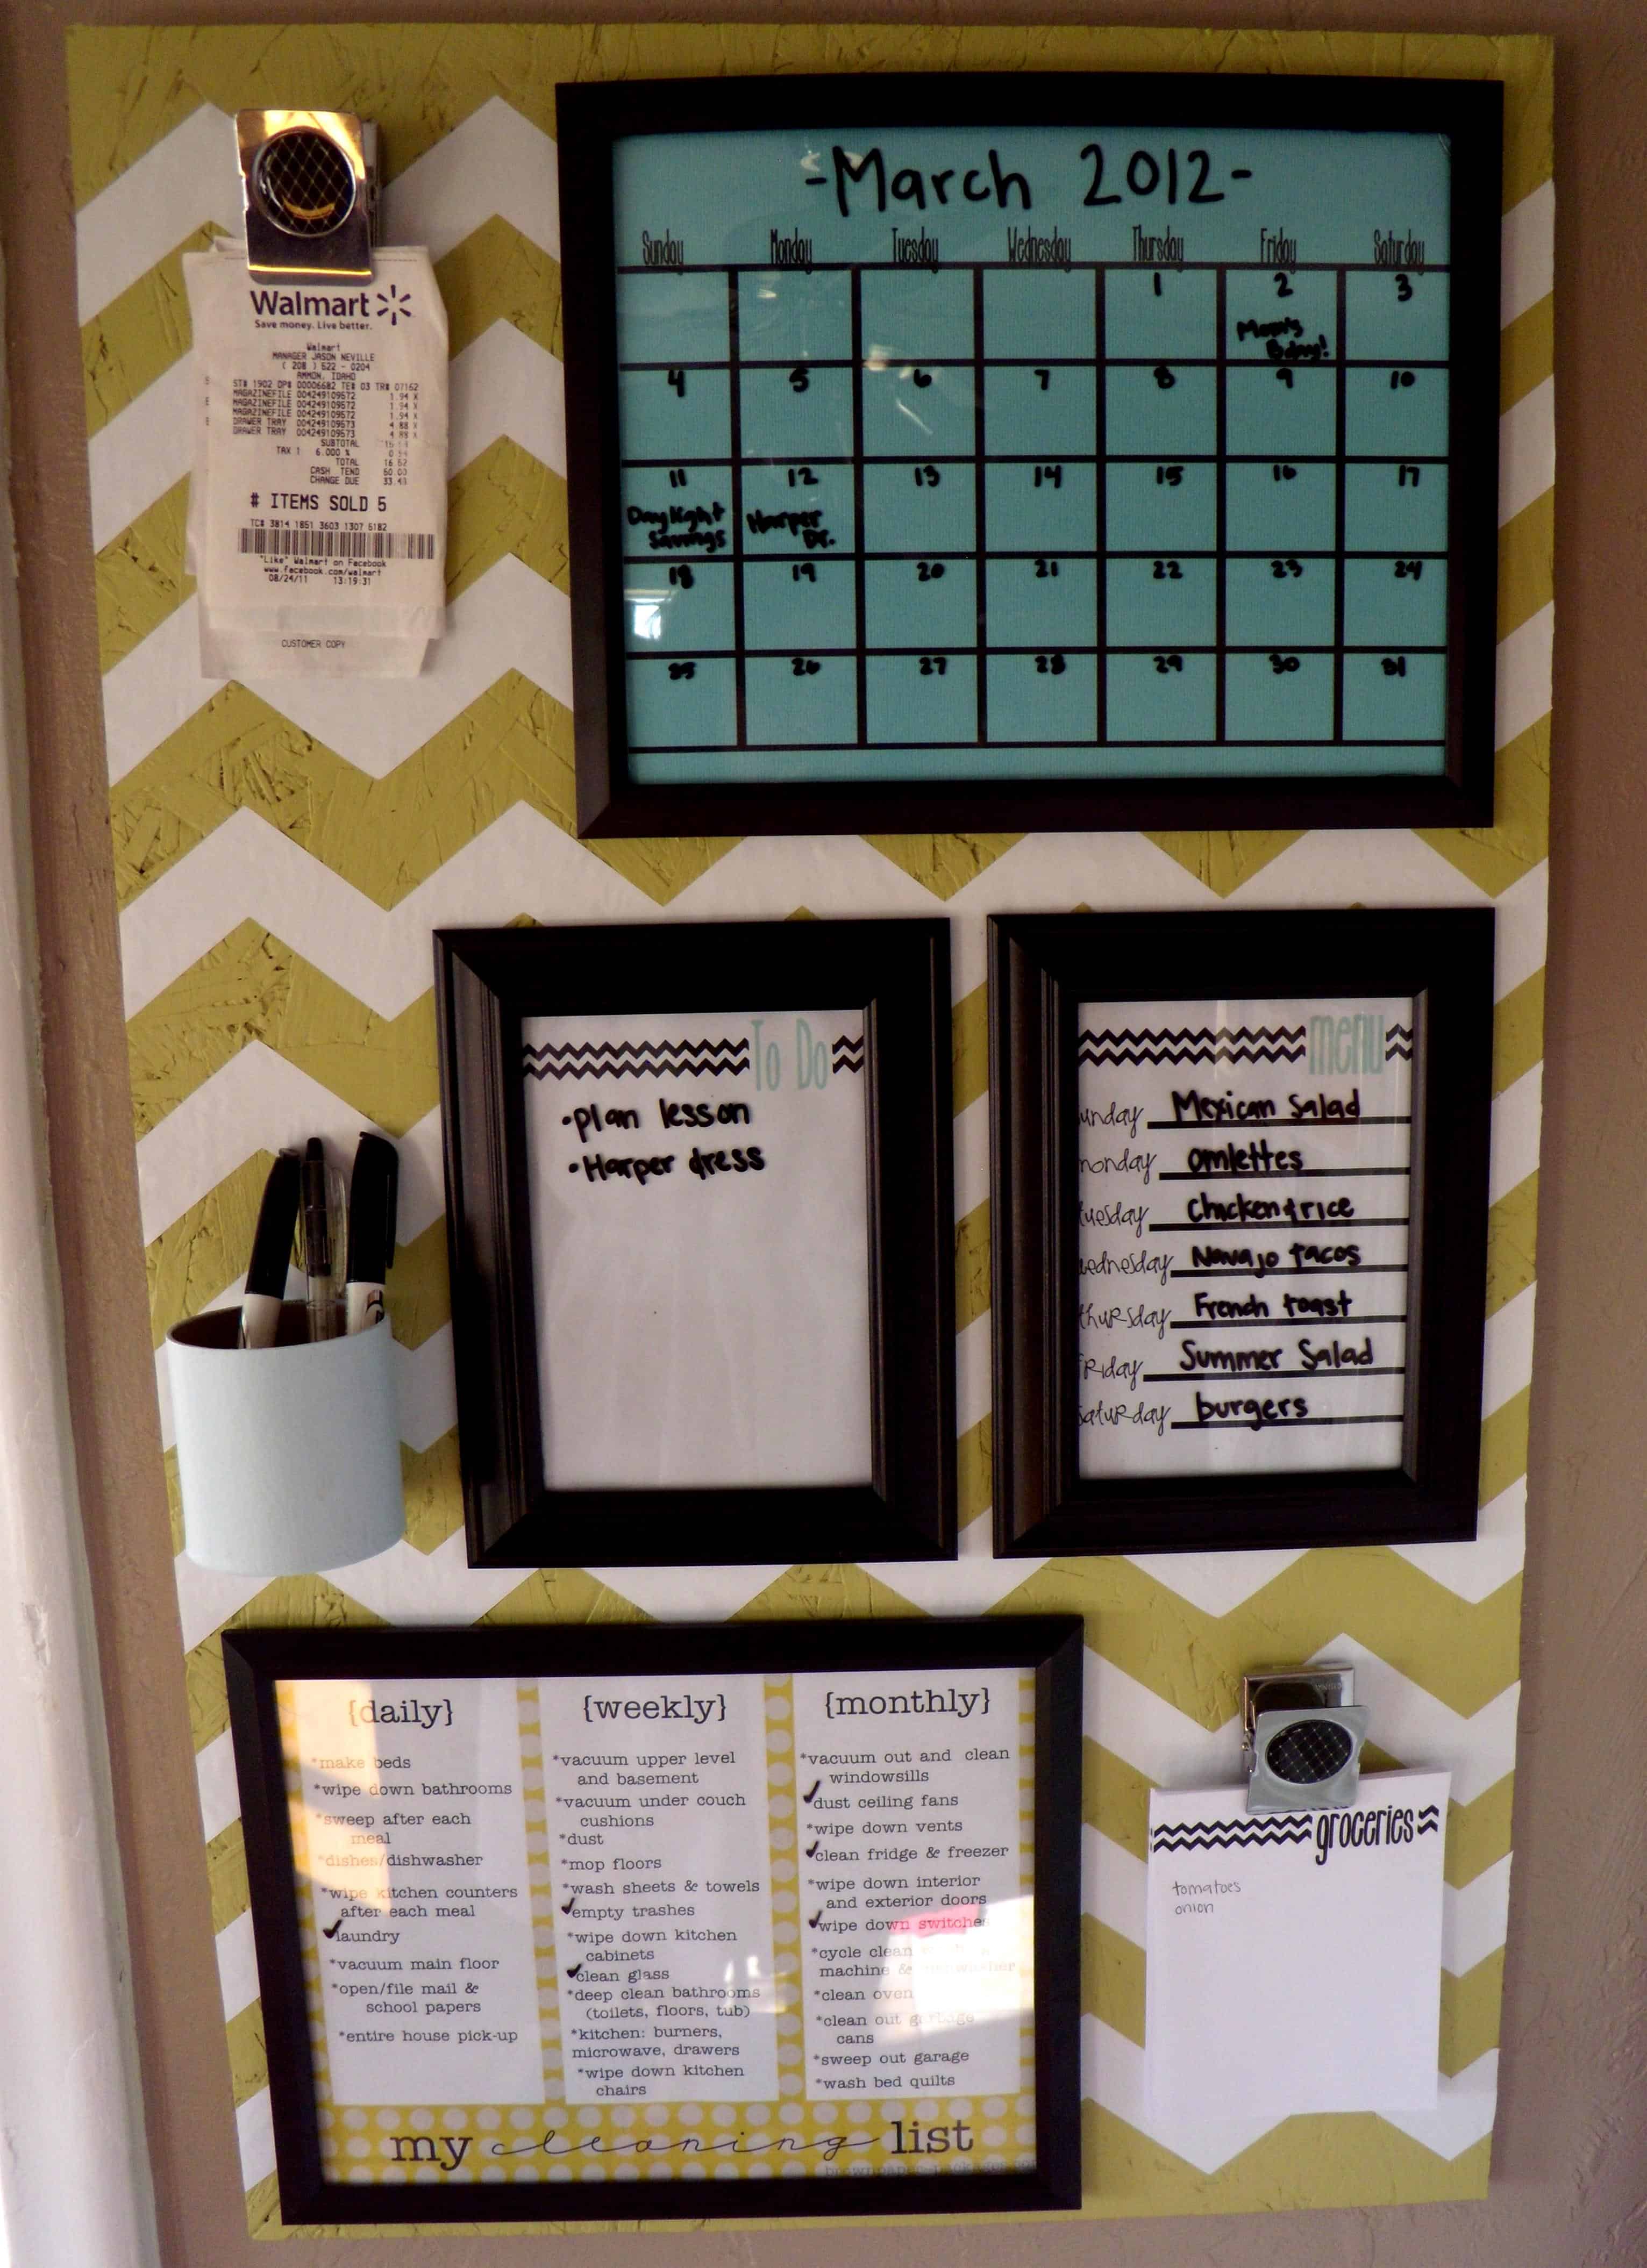
In March 2012, I made an organization board to help keep my family in order. I made it with a baby strapped to my chest and decided to put it on my blog that I had just quit my day job for. Three months earlier, I had decided to take the plunge and be a full time blogger… at the exact same time as I had my first child. Interesting timing, right? Well, that little organization board tutorial went VIRAL! I had no idea what was going on. I just suddenly was getting hundreds of comments, emails, and my life was completely changed. That post is still one of my top traffic sources to this day, but I cringe every time I see it pinned on Pinterest, which is over 500k times… that is a lot of cringing! The lighting was terrible and I am SO over chevron print and the colors aren’t exactly my style anymore. You can see the full tutorial for my first organization board, here.
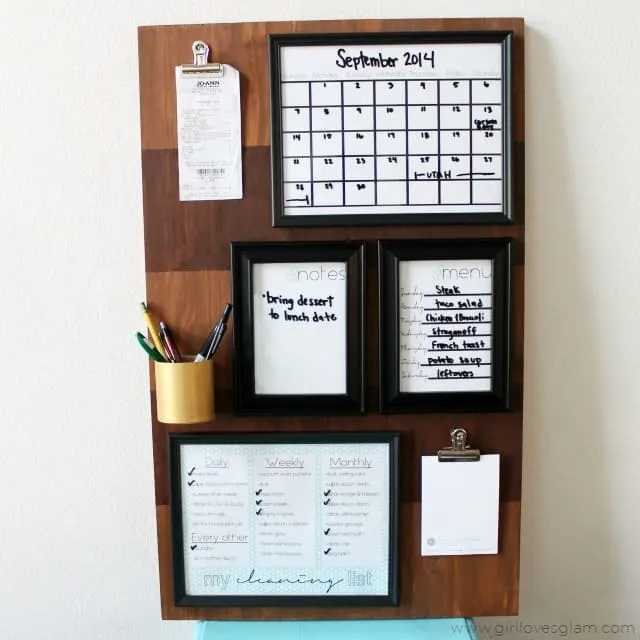
I have wanted to change up the good ol’ organization board for a while now, but just have had ZERO motivation to do it. Once we moved, I decided to finally take on that project. I set my entire old board a side and started fresh! Ladies and gentlemen (for the one random dude who happens to come across this post), I present to you… The Organization Board Family Command Center version 2.0!
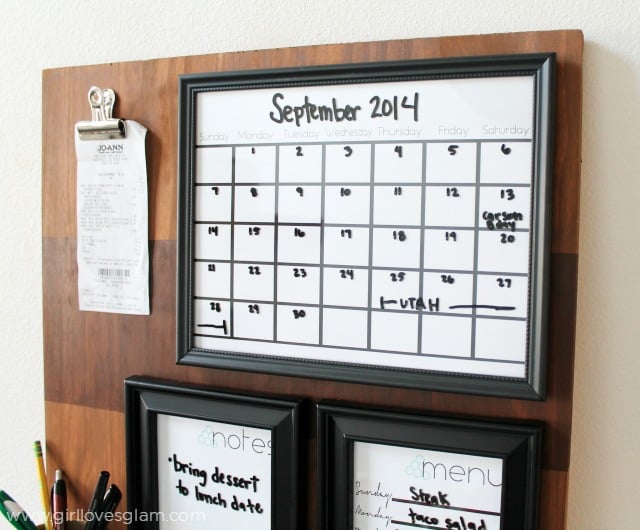
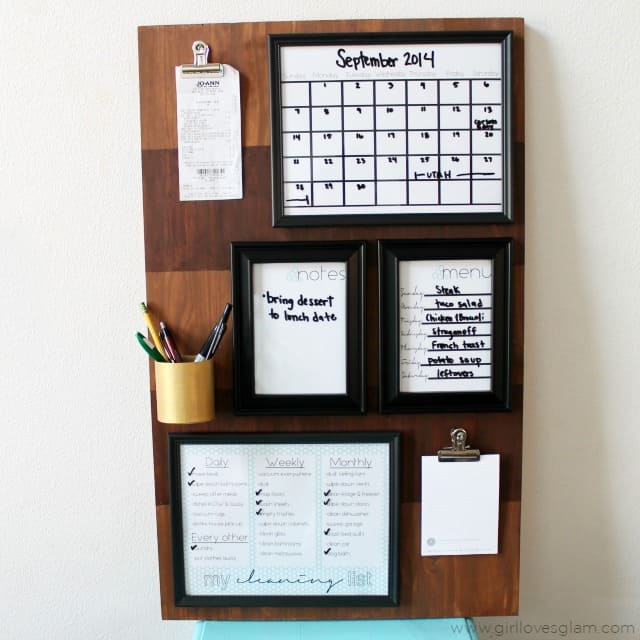
Ahhhhh… isn’t that so much better? I really wanted to bring in some natural elements with the stained wood, while keeping some funky features like the stripes and the metallics.
To make your own, you need…
-Laminated pine cut to 30.5″ x 19″
–Minwax Stain Wipes in Dark Mahogany
-Two 8.5″ x 11″ document picture frames (found at the dollar store)
-Two 5″ x 7″ picture frames (found at the dollar store)
–Two bulldog metal clips (The link is to buy 12, but you can buy a pack of 2 at Walmart)
–3″ round paper mache box (The link is to buy 14, but you can buy just one at JoAnn Craft)
–8 medium Command Strips for picture hanging
-Hammer
-Tape measure
-Small notepad
-Calendar, notes, menu, and cleaning list printed off. (links to those are further down in the tutorial)
-Painter’s tape
-Gloves (the Minwax Wood Finishing Cloths come with one pair each, but you might need some extras)
-Sandpaper
-Gold paint
-Paper towels
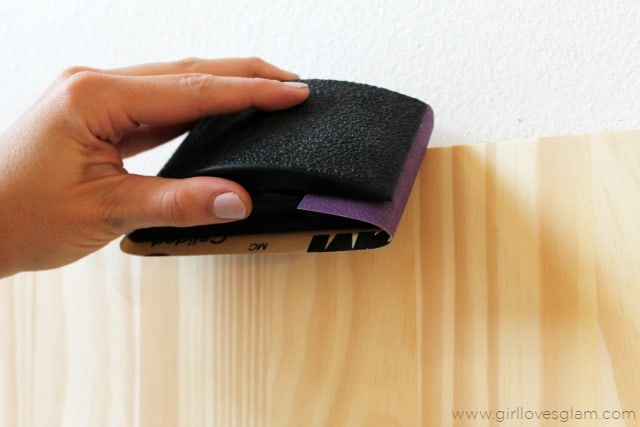
The first thing you are going to want to do, is sand your wood. The laminate is going to be mostly smooth, but just make sure to sand the edges and any areas that aren’t nice and smooth. I just did a light sanding, nothing you need to put a whole lot of elbow grease into.
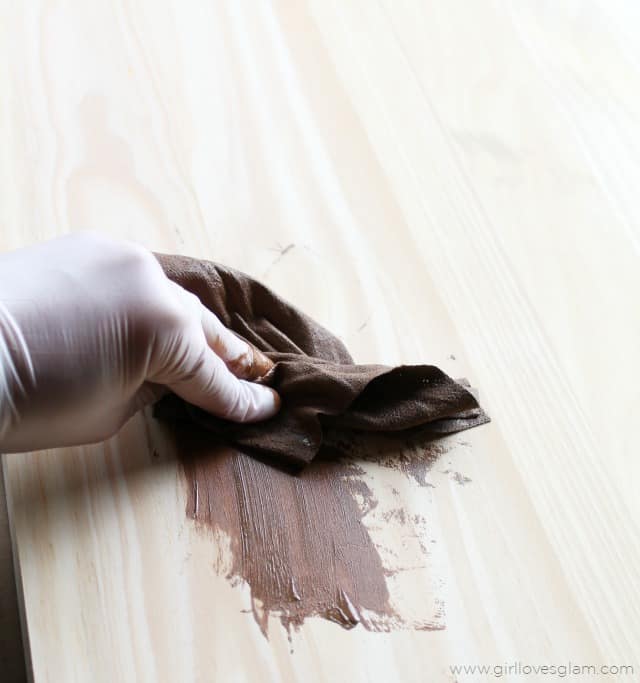
Now for the fun part, staining! Staining wood can sound like a scary process, but these Minwax Wood Finishing Cloths are seriously the coolest! If you have ever used a Clorox wipe, you can stain wood. You literally wipe the stain on with the cloths. Just wipe in the same direction as the wood grain and make sure you have covered all of the wood. Then go back and wipe the stain off with a paper towel. It says that it takes an hour to dry, but mine was sitting in the sun and didn’t take that long at all.
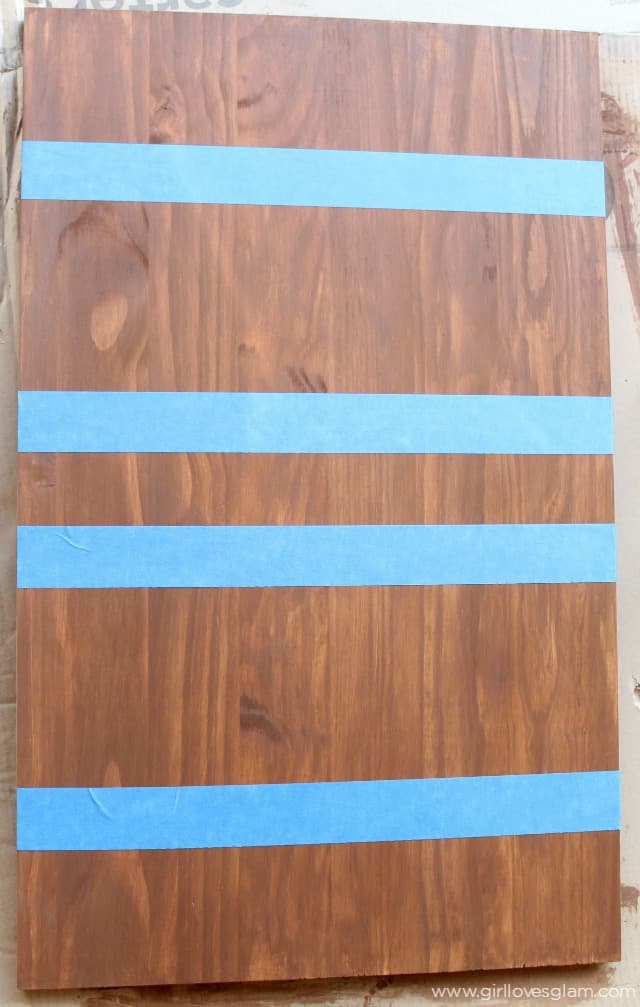
Measure how big you want your stripes to be and tape them off. I wanted to have two darker stripes that were 6 inches each, so that is how mine is taped.
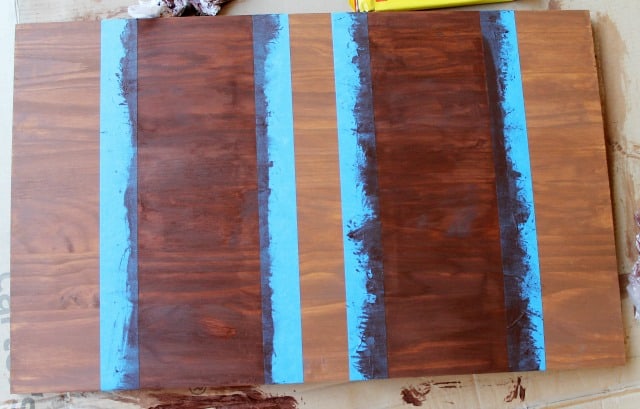
Now, wipe your darker stain where you want your stripes to be. You may need to wipe sideways, instead of with the wood grain by the tape, but just make sure to go back and wipe with the grain afterwards so that when it dries, it is all in the same direction. After you have wiped it on, wipe it off with a paper towel and let it dry before taking the tape off.
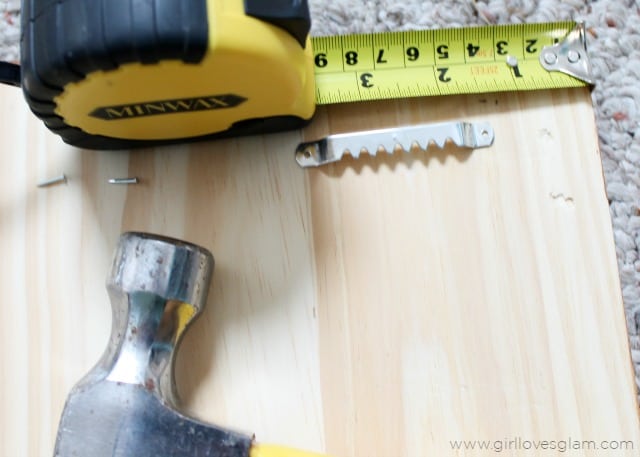
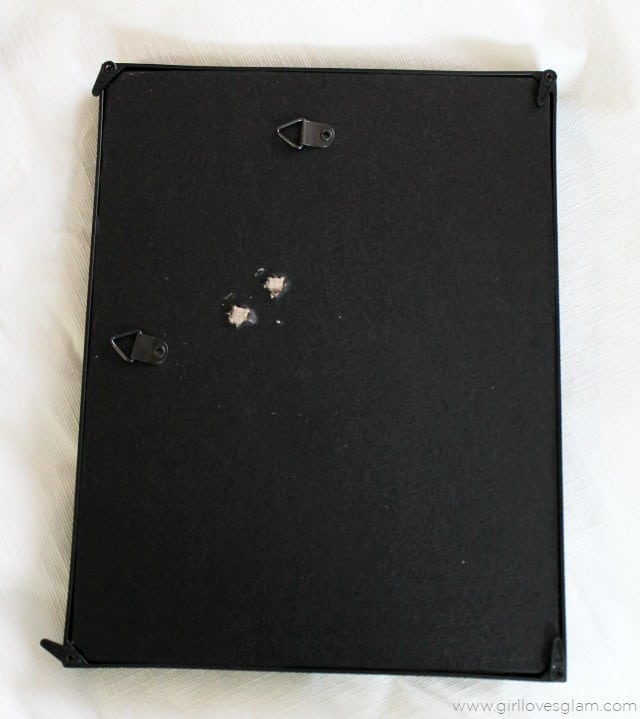
Flip your wood over and measure a spot for your hangers to go. I put mine at 1 inch down and 1.5 inches over. Nail them into place. Just a tip, if your wood is thick enough, use longer nails when you put them in. The tiny nails they give you with the hangers are kind of hard to get into place because they are so short.
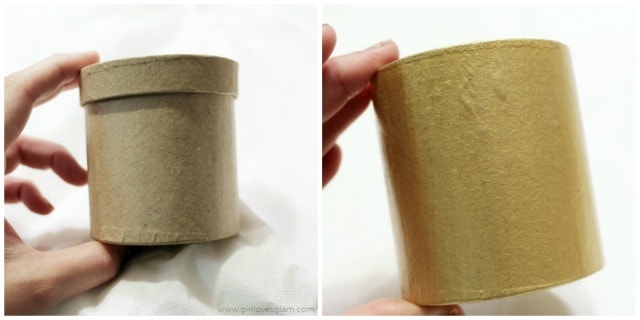
Paint your paper mache box and throw the lid away. Props to you if you can think of something creative to do with the lid.
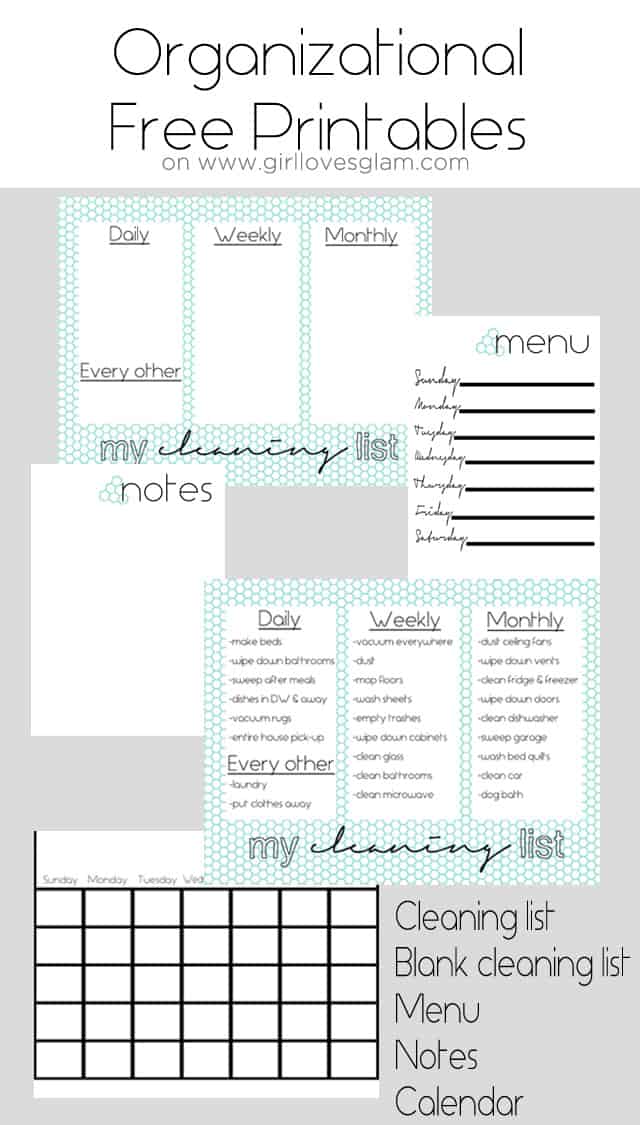
Print off all of your printables. I printed all of mine off on white cardstock. Click on each of the links to get the printables. There is a link to my cleaning list and blank cleaning list if you want to open it up in one of your computer programs and add your own chores or even just write them down with a marker. These printables are very similar to the last ones, but I wanted them to feel more modern. I went with a hexagon theme because it is trendy, but these printables are really easy to switch out when I get sick of them. I also decided not to make grocery list printables this time and just have a notepad on my board because I use a list making app for my grocery list and found myself using the grocery list papers as scratch paper anyway.
Put the printables in the picture frames. Rip the stands off of the backs of the picture frames.
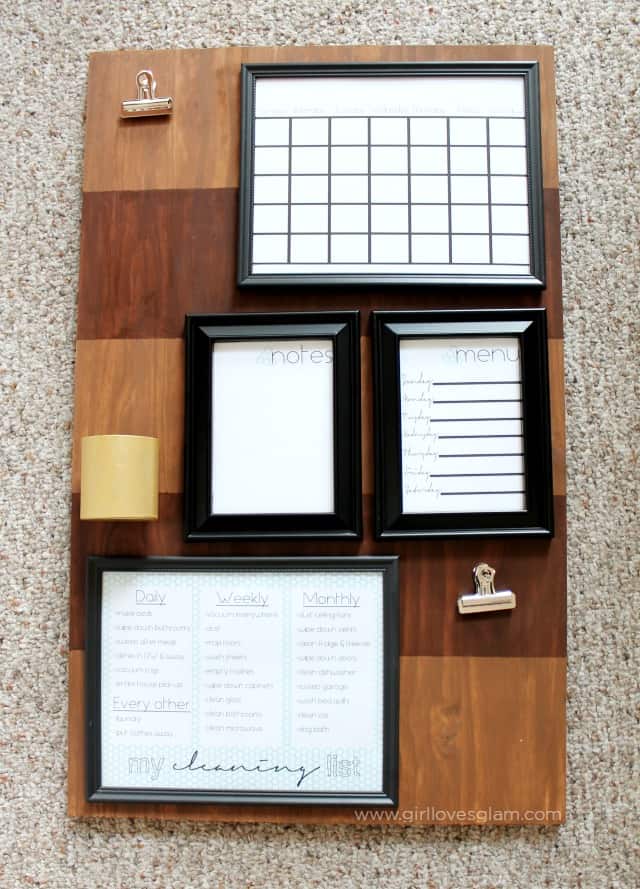
Lay out all of the frames on the board with the paper mache box and clips to get them right where you want them to be.
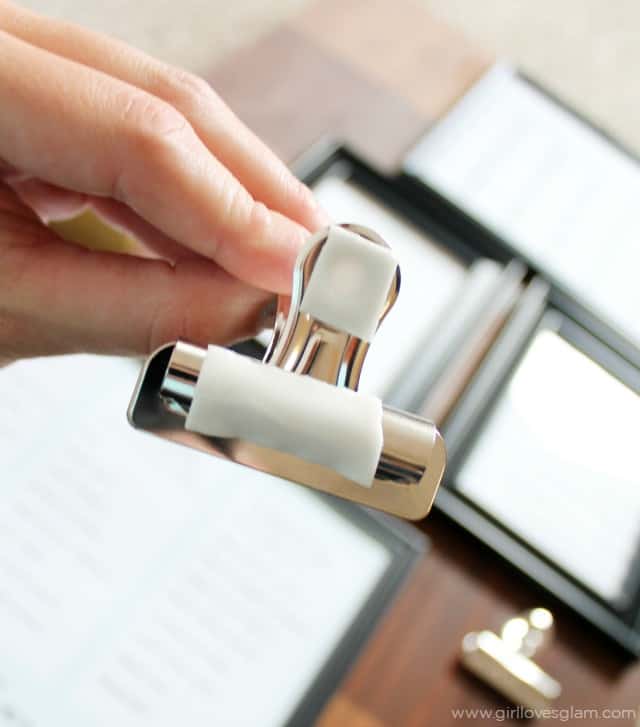
Put two of the picture hanging command strips on the top corners of each of the frames and stick them to the board where you want them to be. Put two regular command strips on the flattest side of the paper mache box and stick it to the board. Cut up a command strip and stick it to the back of your bulldog clip on the top and on the clip part and stick them onto the board as well.

Hang up your board, put your notepad in one clip, your pens and pencils in your box, and start organizing!
I love that this gives us one space that has our family calendar, a clip to put our receipts and bills on, a dry erase note pad, our weekly menu, our cleaning list, our writing tools, and some scratch paper all in one place.
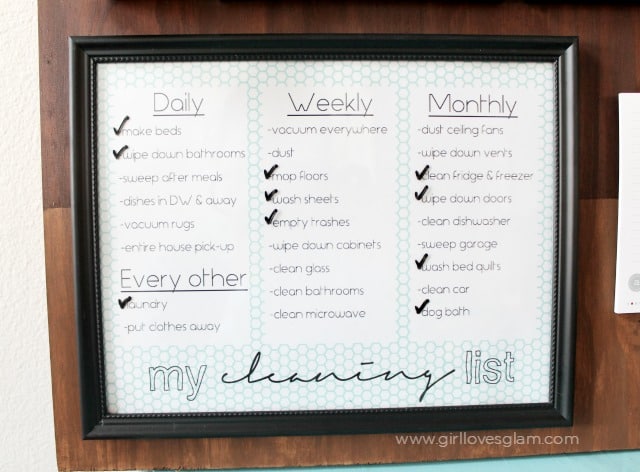
I love how much more modern the printables look with the hexagon theme and the seafoam green color that the hexagons are in this time. This cleaning list is literally how I function! I find myself getting too busy to clean unless I have a list there to tell me exactly what to do. It is great because my daughter loves to help me check off chores on the list too. It helps teach her responsibility that way, even if she is too little to do most of these chores on her own.
And there you have it! Organization Board 2.0! How do you keep your family organized?
Massive List Of Creative Dollar Store Organizing Hacks You'll Love - Do-Talk
Saturday 27th of October 2018
[…] Organization and keeping a schedule is important for all families. With schedules of parents and kids, a command center is the best way to stay on top of all those schedules and things you need to remember. Find the tutorial to create a command center here. […]
10 $Dollar Store$ Tricks That You Will Definitely Find Valuable – Facts WT
Thursday 23rd of August 2018
[…] Image Source: Girllovesglam […]
Joann Russo
Friday 23rd of March 2018
I tried to go to your site to print what you offered but there is nothing at that site.
16 DOLLAR STORE ORGANIZING IDEAS - DIY
Friday 1st of September 2017
[…] 2. Family Command Center […]
Creating a Command Center – Cassia & Co.
Tuesday 6th of June 2017
[…] A small space solution with a printable cleaning list […]