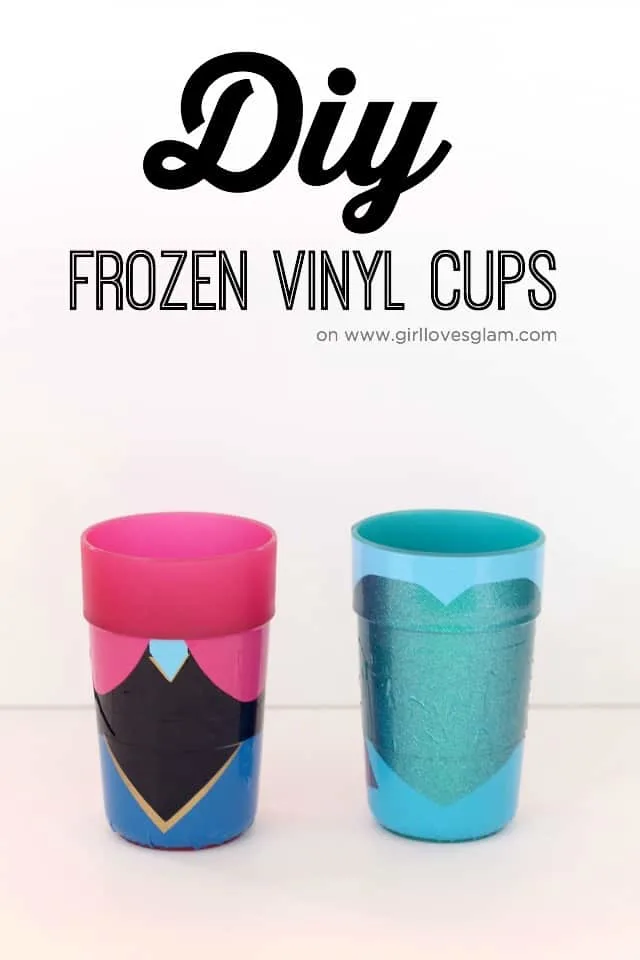
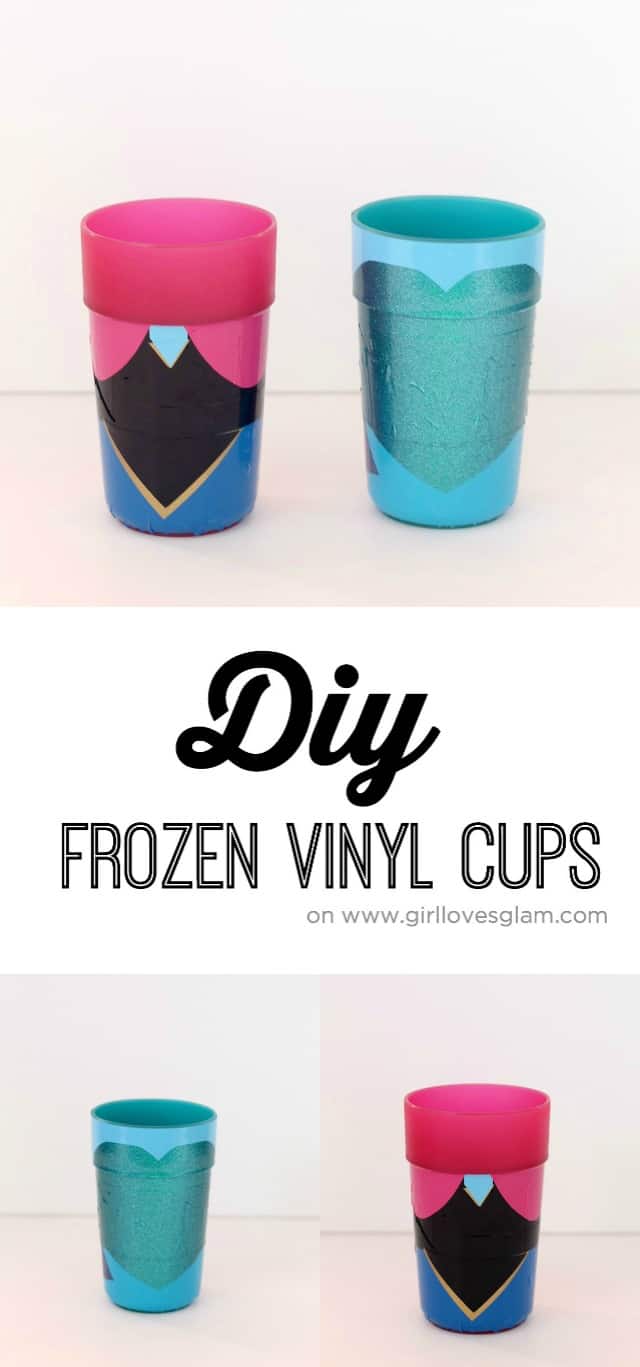
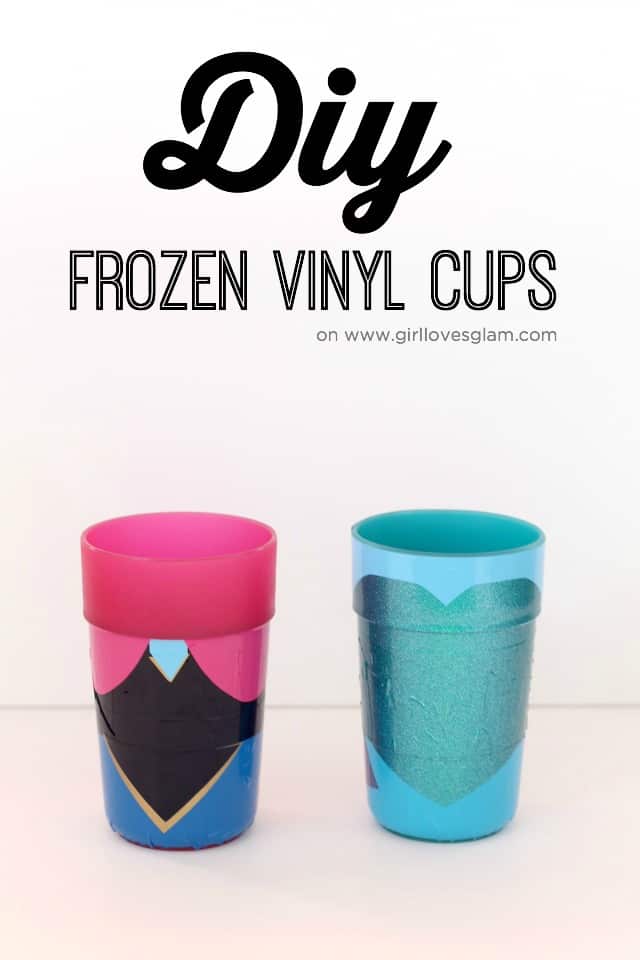
Frozen Elsa and Anna DIY Vinyl Cups are so easy to make!
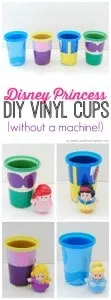
You may remember my post about my Disney Princess cups I made. I have really loved those cups, but I kept getting requests for Frozen characters. Can I let you in on a little secret? That Disney princess cup project was something I did in early 2013, before any of us knew Anna and Elsa! After I started getting requests for Frozen cups, I knew I needed to make an Anna and Elsa to join the rest of the Disney Princess cup gang.
These are both pretty darn easy to make. I didn’t use any vinyl cutters for these because I wanted them to be something that ANYONE could make!
Here is what I used to make these…
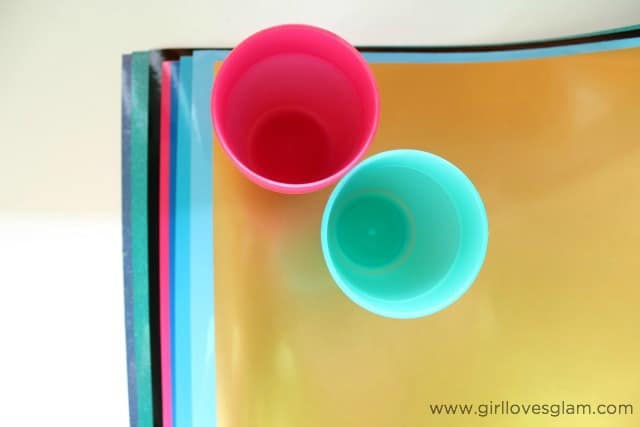
–Pink cup and a green (that actually looks pretty blue) cup from Target
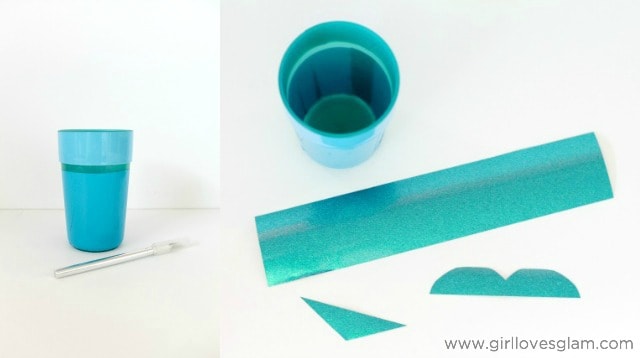
-Vinyl from Expressions Vinyl. It needs to be outdoor vinyl. I am linking each of these to the largest size of vinyl because I always just buy the biggest size, just in case I mess up too many times and that way I have plenty of extra if I wanted to duplicate them or use the rest of the vinyl for another project. You could get smaller sized vinyl though. I used Ice Blue, Light Blue, Pink, Black, Gold Metallic, Gentian, Glitter Ultra Mint, Glitter Light Blue
-Scissors
-Paper cutter
-Razor blade
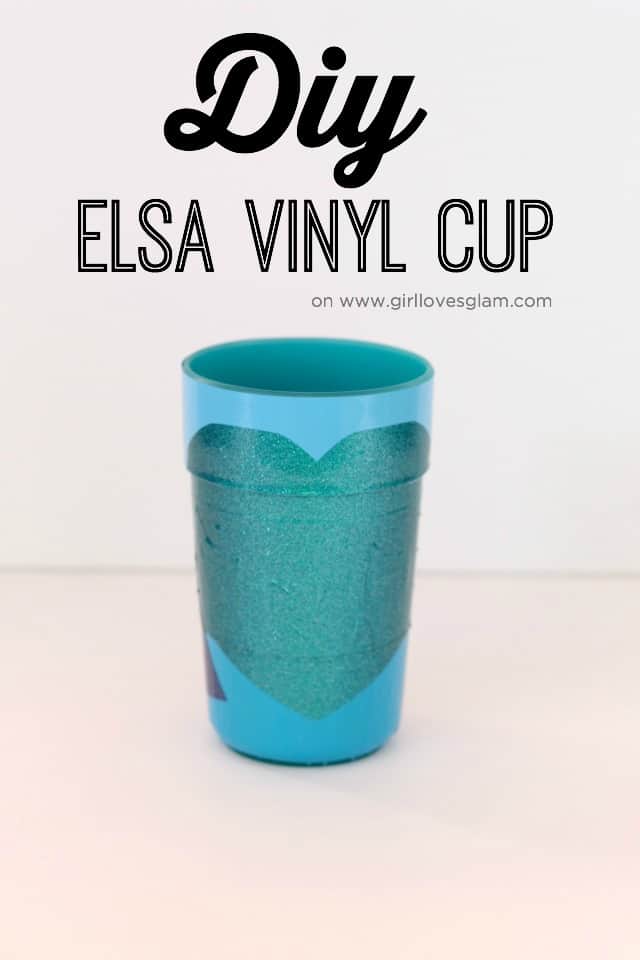
Now let’s start with the Elsa cup, shall we?
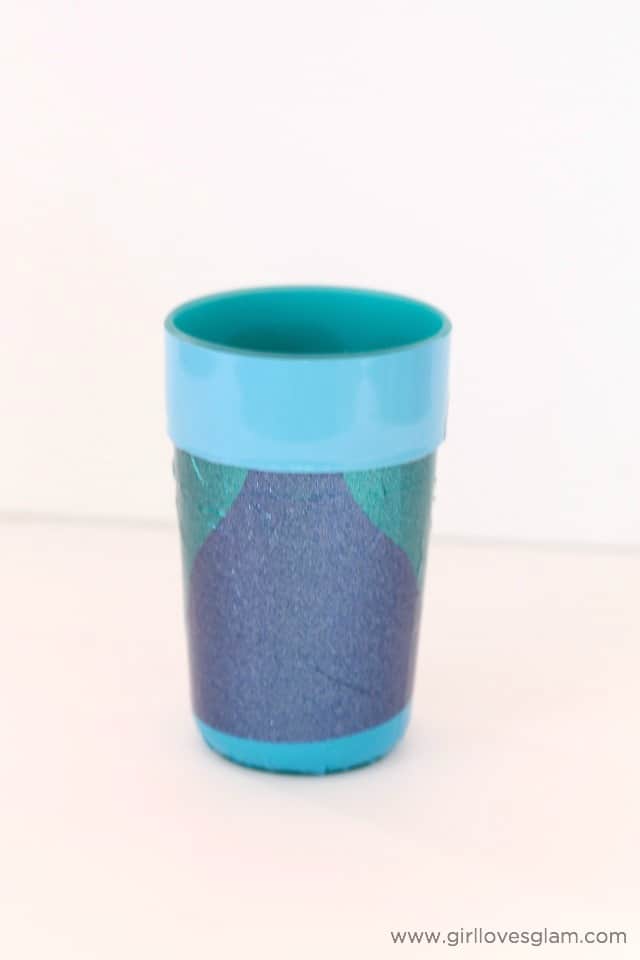
Elsa’s dress looks pretty complex because of all of the different shades icy colors that are involved but when you really start looking at her dress to recreate it in vinyl form, it isn’t that complex at all. I wanted this to be made without a vinyl cutter, so I chose not to add any of the snowflakes to it. You could add snowflakes to it with either a punch or a vinyl cutter though if you wanted to add more details to it. I liked the idea of making the details shine through with the different shades of blue instead.
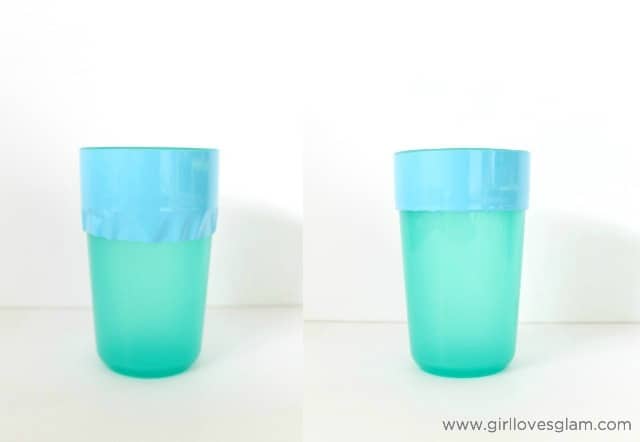
First, I took the Ice blue color of vinyl and cut it down so that it would be just a little bit longer than the rim of the cup. I put the vinyl on and went around with the razor blade to cut off the excess vinyl. This is considered the fabric that makes up her sleeves and her neckline.
Next, I cut a piece of the Light Blue vinyl around the bottom part of the cup. The easiest way to go about doing this is to use a razor blade while you are doing it. My biggest advice is to follow the vinyl along the bottom of the rim of the cup and then slice the vinyl with the razor blade so that it contours around the cup as you wrap it around. Cut off the excess vinyl from the bottom of the cup.
After that, you need to cut a strip of the Ultra Mint color that will go all around the cup, a triangle, and what kind of looks like the top of a heart. This is going to make up the bodice of the dress. Wrap the strip around the top of the Light Blue vinyl that you just placed on there. Put the top part of the heart on the top rim, just above the strip, and the triangle just below the strip.
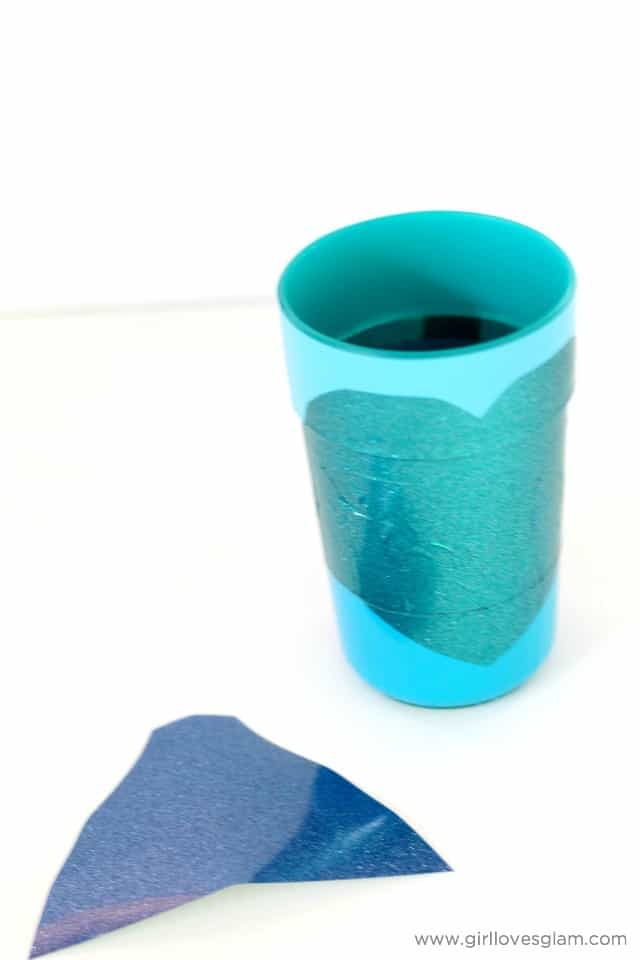
Next, cut a piece of the Light Blue Glitter vinyl to look like a cape. The picture isn’t that great because the vinyl was folding a little so it looks more like a fish fin, but in reality, the bottom of that is a straight line.
Place it on the back side of the cup, with the top of it going right at the bottom of the rim of the cup.
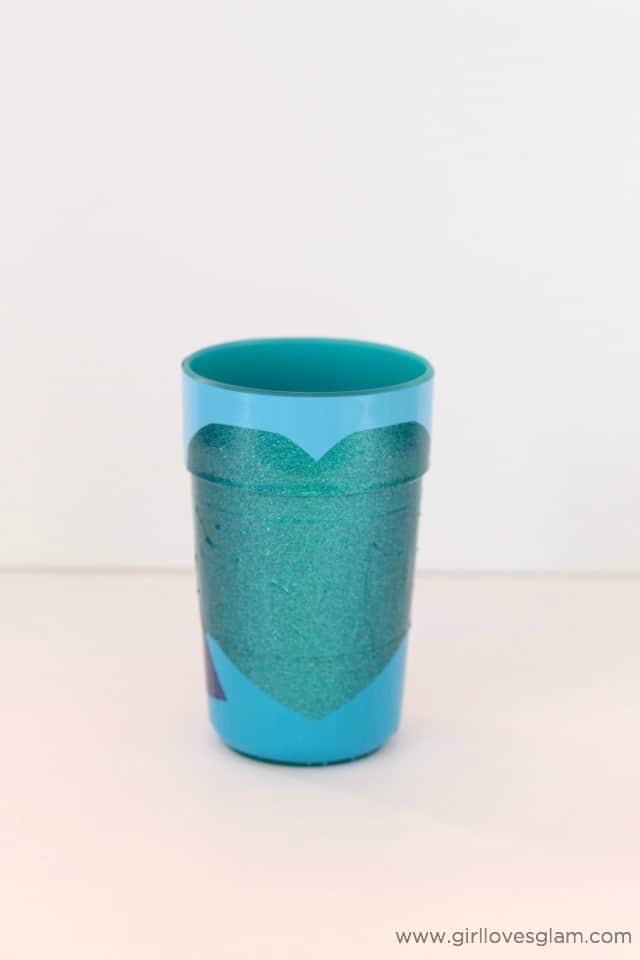
Now you have the cutest little Elsa dress inspired cup for your Frozen fan!
My favorite of the two is definitely the Anna cup. I think it just turned out so cute!
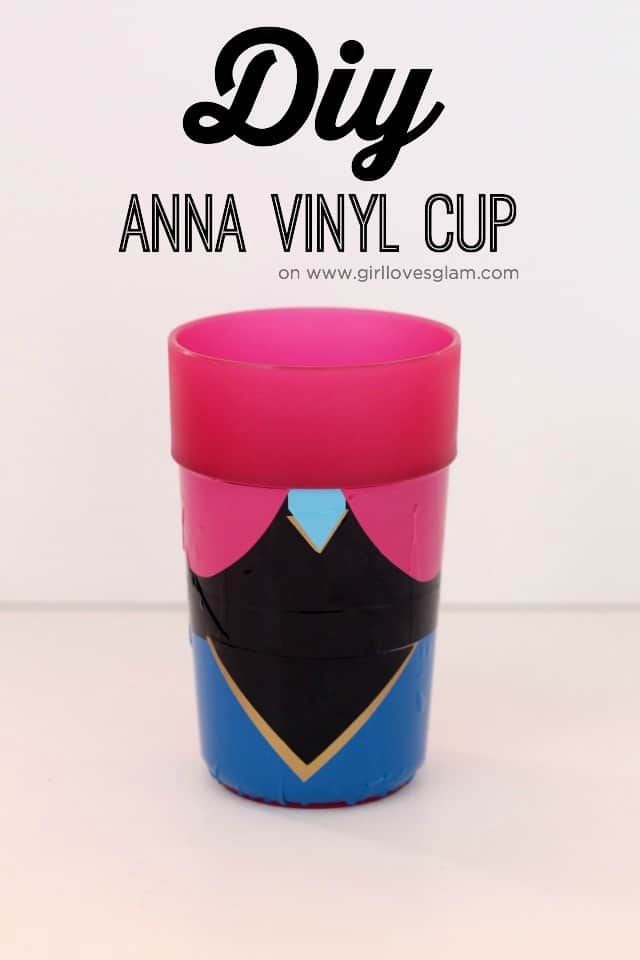
I didn’t want to put all of the fancy details on it because it is just a little cup. I wasn’t willing to put in hours to make a cup! I kept things pretty simple and I still think it turned out pretty darn cute.
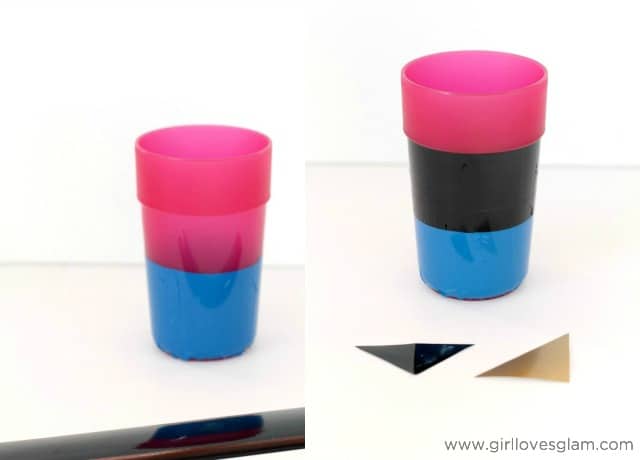
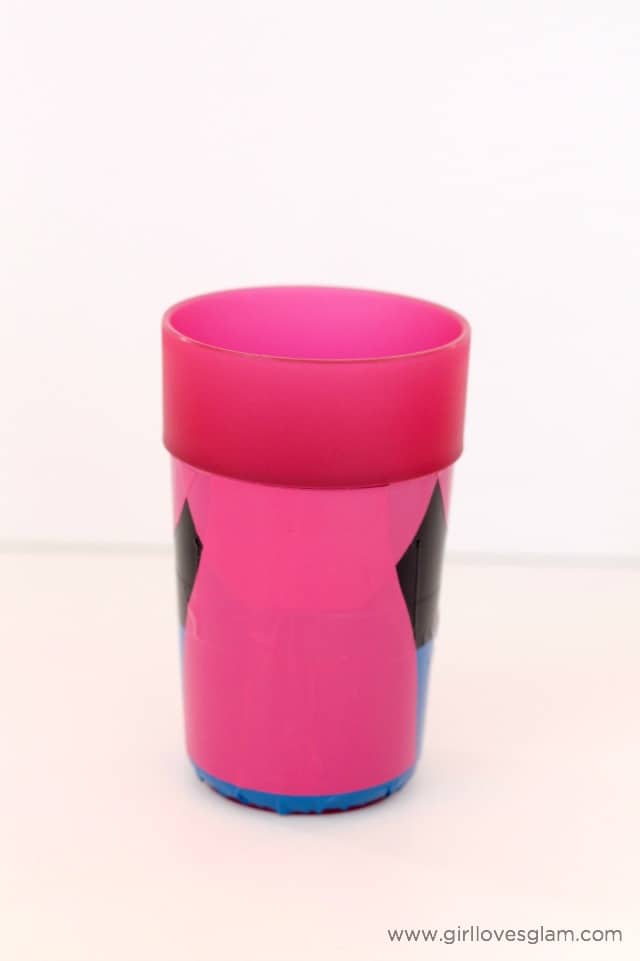
First, cut a strip of the Gentian vinyl and wrap it around bottom of the cup. You will need to use a razor blade to cut little slits in the vinyl so that it lays nice and smoothly on the cup.
Cut a black strip of vinyl and line it up with the bottom of the rim of the cup and wrap it around. Once again, you will need a razor blade so that it will lay nicely.
Cut a triangle out of the black and the gold vinyl. The gold triangle will need to be slightly larger than the black one.
Put the gold triangle on the cup, just below the black strip. Place the black triangle on top of the gold one. Cut out a tiny piece of the Ice Blue vinyl that you used on Elsa in the shape of a house… kind of a triangle with a longer end on one side. Cut a small triangle out of the gold vinyl too. I found it was easier to put this vinyl on when I placed the gold triangle on the back of the blue one, before placing it on the cup. I got it all lined up and then I stuck it on the front of the cup, just below the rim.
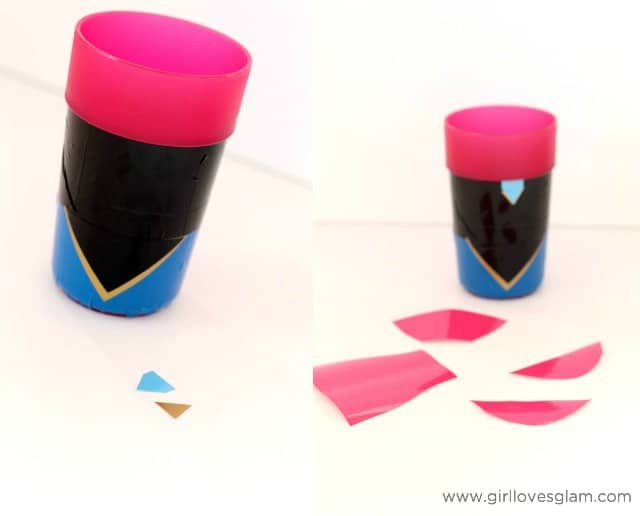
Next, cut out two half ovals, a long cape shape, and another piece shaped like a half oval with the bottom cut off out of the Pink vinyl. This is going to make the cape.
First, stick the flat half oval in the very back of the cup, right along the bottom of the rim of the cup. This piece is just to make it so the front part of the cape and the back part all connect. You could make the front ovals longer to make them connect, but I had already cut the front part out and just thought this would be easier. Place the back part of the cape over the flat oval. Put the front half oval pieces on either side of your little blue “house” shape and overlap the back half oval piece just a little bit.
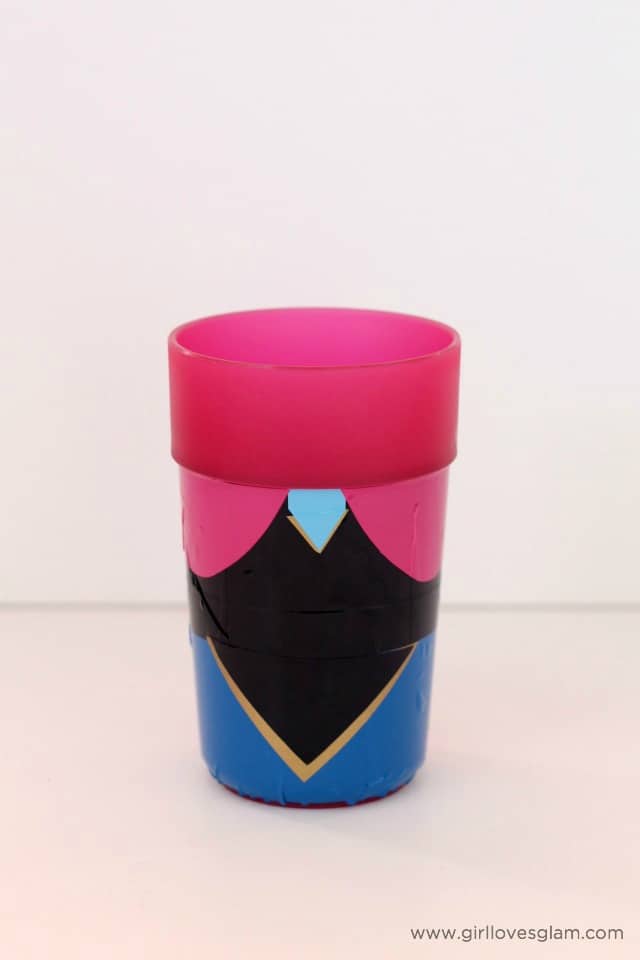
Your cute, little Frozen Anna cup is now complete! See, they weren’t too bad to make!
Would you have any interest in other character vinyl cups?
This year is a really exciting time to be able to make these cups because Disneyland is turning 60 and they are adding all of the great Frozen stuff to the park! If you are thinking about planning a Disneyland trip this year, check out these great posts from Get Away Today about the Disneyland 60th Anniversary HERE, HERE, HERE, and HERE. If you are thinking about using Get Away Today to book your travel, please use my link or tell them I sent you, I am an affiliate for them and I would love to save a little on our trip this year! I wrote a post all about how we are saving to go to Disneyland this year that you can check out HERE too!
I just KNOW you will love these other tutorials too!


Amanda Powers
Tuesday 4th of September 2018
That's really amazing article! Thank you for sharing this!
Disney Princess Vinyl Cups - Girl Loves Glam
Tuesday 21st of July 2015
[…] Frozen Elsa and Anna DIY Vinyl Cups - Girl Loves Glam says: May 22, 2015 at 8:23 am […]
Great Ideas -- 17 Quick & Easy DIYs!
Tuesday 26th of May 2015
[…] DIY Frozen Vinyl Cups @ Girl Loves Glam […]