This post contains affiliate links.
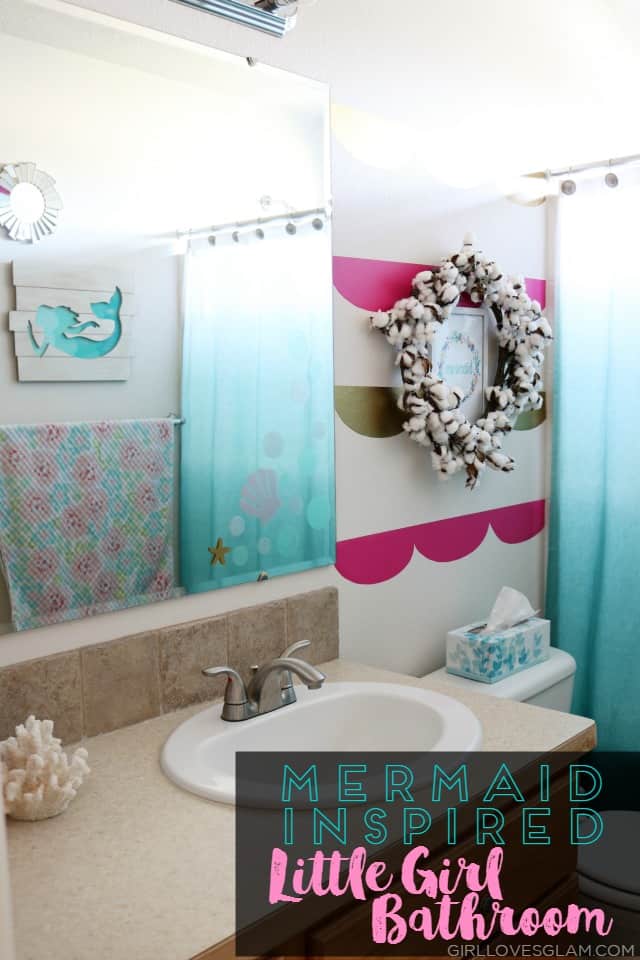
After we moved about a year ago, I moved over all of the decorations that we had used in our little girl bathroom from before and put them in the new bathroom. The problem was that it just didn’t look nearly as cute as it did before. The new bathroom is a little larger and just didn’t look great after I decorated it. It was one room that really bothered me. It is silly that a little girl’s bathroom could bother me that much, but I have been dying to give it a makeover. So when the opportunity came to be a part of a competition for Expressions Vinyl, I took it as a chance to makeover the bathroom that has been driving me nuts! We turned this bathroom into the room where under the sea dreams can come true… a mermaid inspired little girl bathroom!
It is safe to say that we are both completely obsessed with how it all came together. Before I go into all of the details, I am going to give a shameless plug to go vote for me and enter the giveaway from Expressions Vinyl! Vote for #6! After you go vote, come back and scroll down to get details about the bathroom and tutorials! VOTE HERE!

Thank you to all of those who took the time to vote. It means a lot! Now for more of this bathroom.
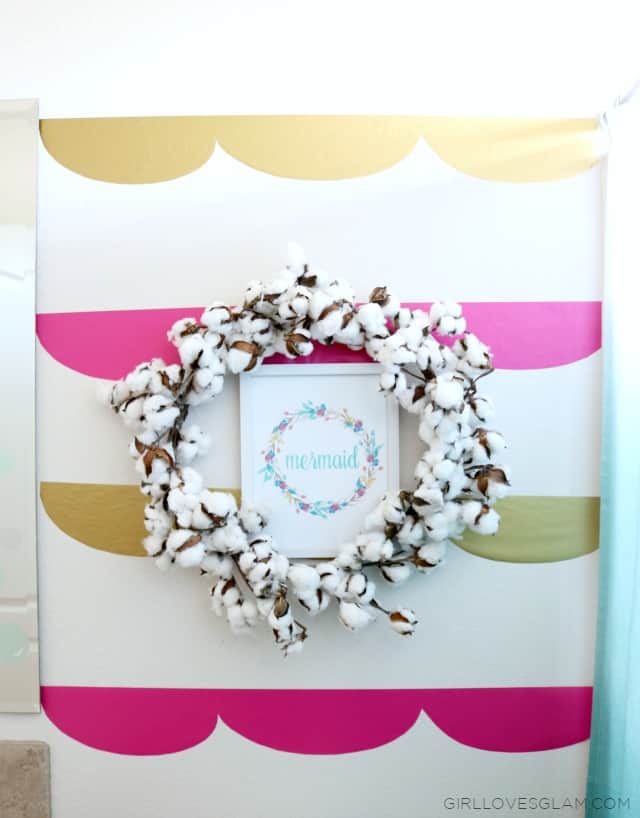
My idea was to have these adorable scallops all over the walls and they were going to be in bright pink, gold, light pink, and turquoise. I ordered all of the vinyl from Expressions Vinyl and purchased the scallop design from the Silhouette Studio and cut the vinyl out without a mat. It was my first time cutting without a mat and it definitely had a learning curve. I have an older model of the Silhouette Cameo and it kind of struggled keeping the vinyl in place while it cut, but as long as I was there to make sure the vinyl stayed in a straight line the entire time it all worked out. It took a while to learn that but just be aware that if you are cutting vinyl without a mat and you have an older Cameo, you may have to do the same.
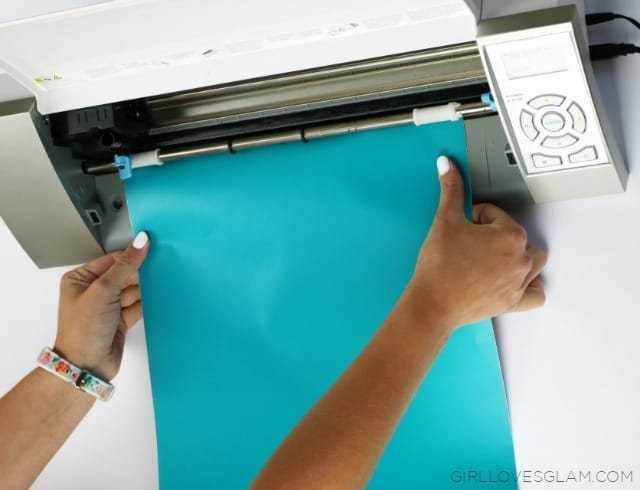
After I cut the vinyl out, I put it up on the walls of the bathroom. When you are doing stripes, I recommend using a laser level to insure that your stripes are all going on straight. I got all of the vinyl off and the next morning I woke up and all of the vinyl had fallen off of all but the two small sections of the bathroom that I ended up keeping the vinyl on. This has NEVER happened to me and I have been working with vinyl for about 6 years now. After doing some research, I came to the conclusion that those walls either had too much texturing done or have had too much exposure to moisture to hold the vinyl. I think it is a combination of both because the walls that held the vinyl feel differently than the walls that the vinyl fell off. It kind of feels like those walls were textured last and they were running out of the texture in their sprayer when they did them because there are tons of tiny little specks of texture instead of the feel of all of the other walls in my house. I do NOT want this to turn you against vinyl at all. I lived in a 100 year old house with plastered walls that were completely textured and the vinyl never had a problem on them. I think this was a very unique situation and I don’t expect that it will happen again to me. I just wanted to be completely up front with you all so you would know what to watch for when you are planning on doing vinyl in your own house, especially a bathroom. Needless to say, that is why I just went with the small amount of vinyl that I did on the walls. Unfortunately the two other colors were so damaged that they couldn’t be salvaged for the space I needed them to be used. I am happy with how it all came together regardless though! It was just a major learning experience for sure.
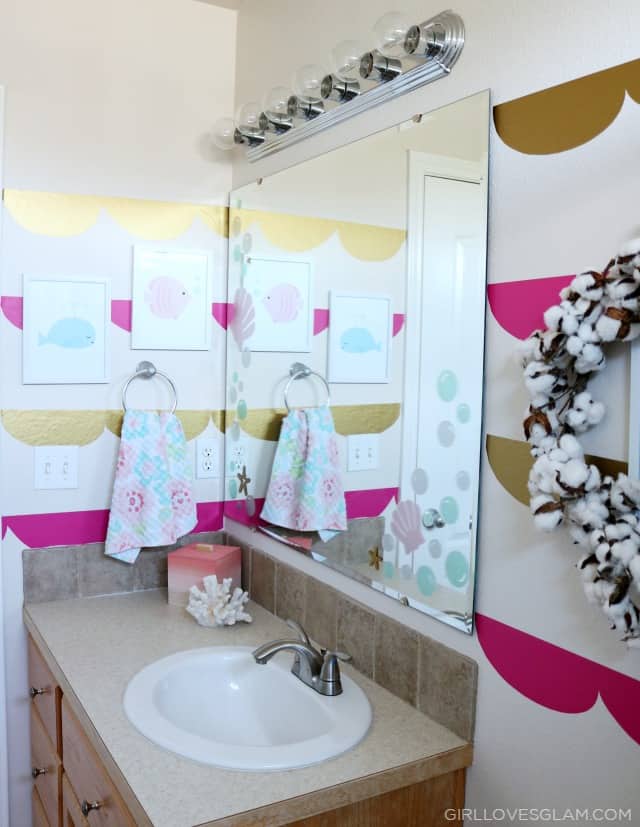
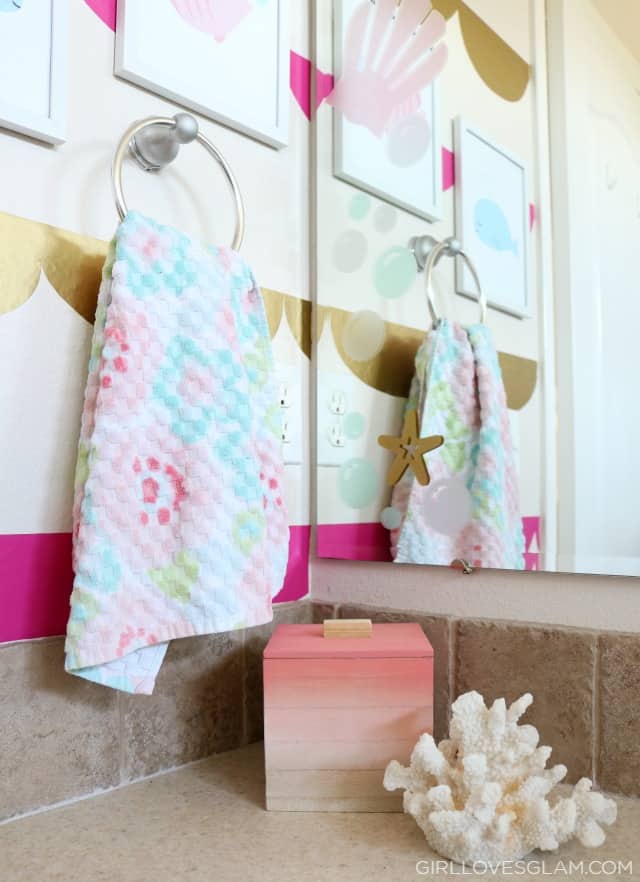
The cute little prints of the fish, whale, and the one that says “mermaid” inside the wreath were all found on the MomoDigital Etsy shop. They were all on sale and I paid less than $5 for all three files to print out. The wreath, the box on the counter, the coral on the counter, and the ombre mermaid picture that is on the opposite wall all came from Hobby Lobby. The shower curtain is from Target.
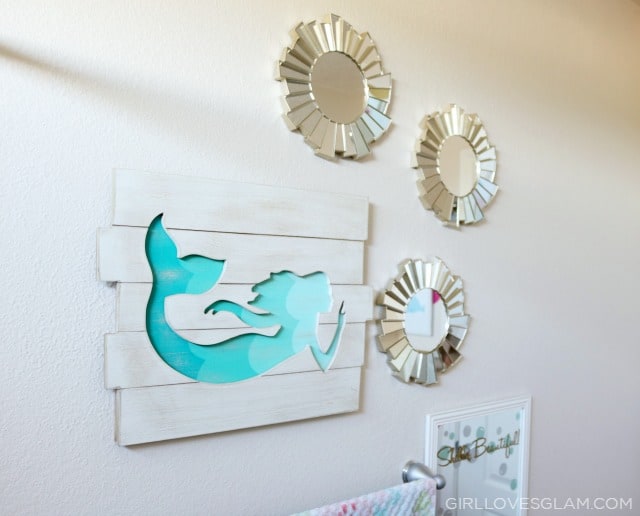
I hadn’t originally intended on decorating the opposite wall in the bathroom because I thought it was going to be so busy with all of the colored stripes on it but in the end I am glad that it happened because I still think it may have been a little too much for the space. I chose to go with a simple mermaid picture and these small round mirrors that I found at TJ Maxx. I like the beach vibes that they give and that it keeps the wall fairly simple while still adding some decorative dimension.
The next item is literally the greatest thing in the entire bathroom. I. Am. OBSESSED!
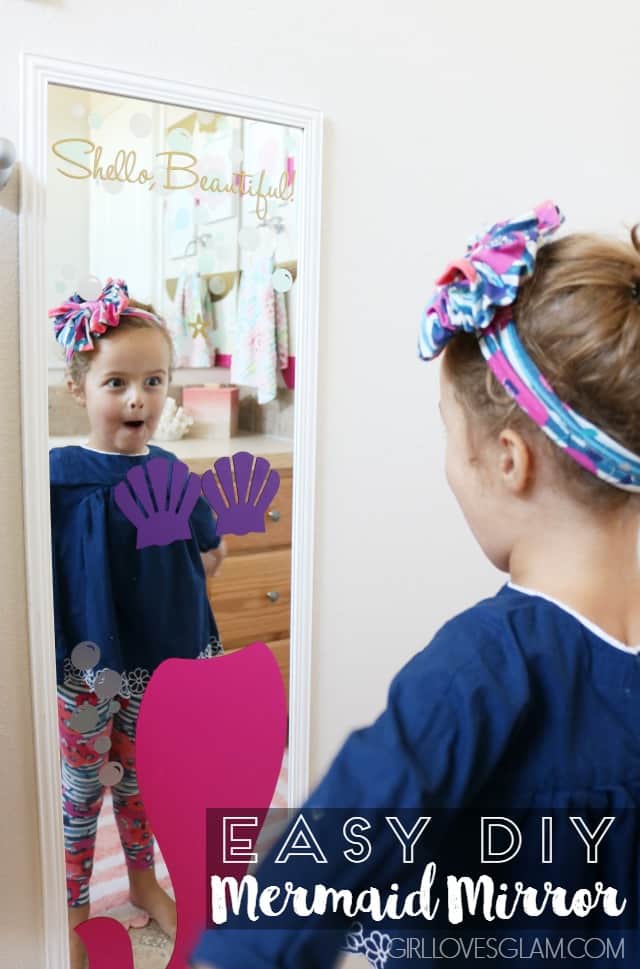
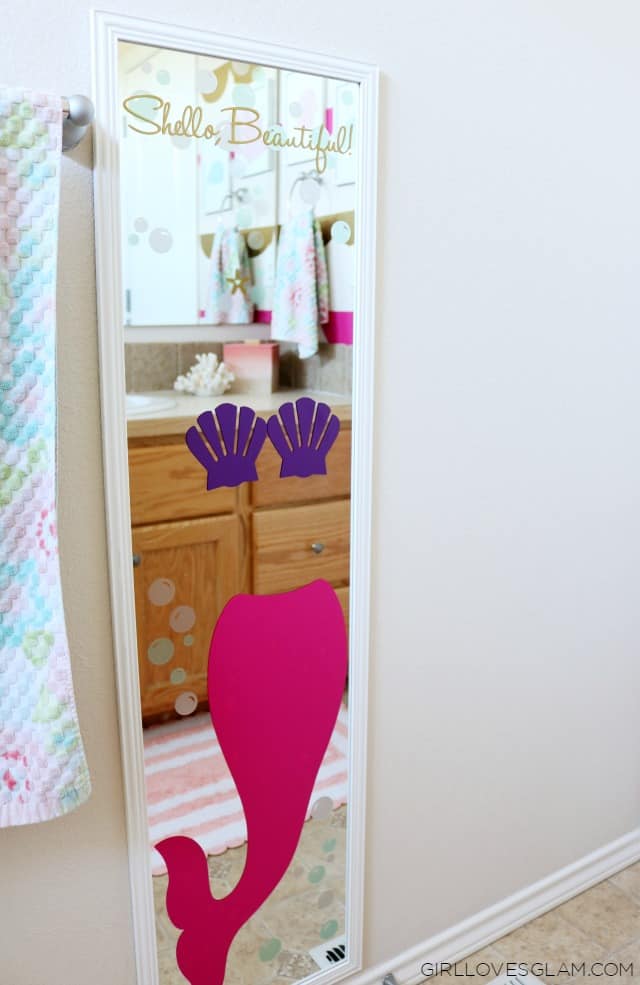
Yes, that would be a mirror that turns Harper INTO a mermaid! If you couldn’t tell by her facial expression, she loves it! The best part about this mirror is how insanely easy it was to make. To make your own, you need…
–3 different colored sheets of Adhesive vinyl from Expressions Vinyl (Mine was indoor vinyl which isn’t typically used on glass, but I didn’t need it to be super permanent)
–Two colors of Etched glass vinyl from Expressions Vinyl
-Long mirror (Mine is a cheap one from Target)
-Silhouette Cameo
When I tell you this project was easy, that may even be an understatement of just how easy it was. Once again, I literally bought all of the images on the Silhouette Studio and cut them out on the vinyl. The most important part was figuring out where to put the tail and the shells so it the mirror would work. I just had my daughter stand in front of the mirror and I measured how far apart they needed to be and then estimated how far up the mirror would be hanging and kind of judged it from there. I didn’t want it to be only the tell and shells, so I added the bubbles that I cut out with the etched glass vinyl and then added the cute, “Shello, Beautiful” on there. She hates that it says that but mom had to have something witty and cute, right? She will think it is funny later… maybe.
The final touches that really pulled the bathroom into the mermaid theme were the little additions on the main bathroom mirror. They are subtle, but I love them!
They just add the right amount of underwater feel, without going completely crazy with the theme.
Like I mentioned before, if you find it in your heart to give this little bathroom a vote, I would be forever grateful! You can VOTE HERE!
Erin
Saturday 9th of June 2018
Where are the cute floral towels from?
McKenzie
Monday 18th of June 2018
I got them at TJ Maxx!
Amy
Monday 9th of April 2018
Holy crap!!! This is exactly what I was looking for. We are buying a new house and doing a mermaid themed bathroom for my daughter. She will love this mirror!!!
McKenzie
Monday 9th of April 2018
I am so glad to hear that!
Vera
Tuesday 5th of December 2017
Love your mermaid decor. Do you take orders? Please LMK. Thank you.
Vera
Tuesday 5th of December 2017
Love your mermaid decor. Do you take orders?
Kristi
Friday 16th of September 2016
I would love to make this- where did you find the shell and the tail? I have looked all over the Silloutte site and can't find them
McKenzie
Tuesday 20th of September 2016
I just looked on my Silhouette Studio and the shells came from a file called Assorted Sea Shells and the tails came from one just called Mermaid Tail. I hope that helps!