Woohoo! Can you even believe it? It is an update of the…
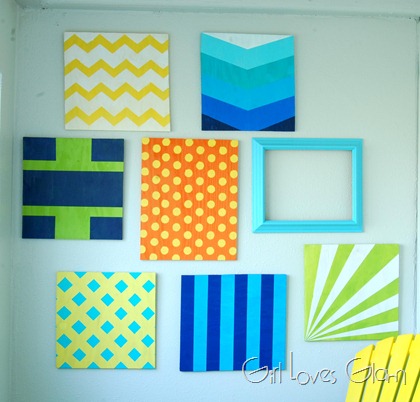
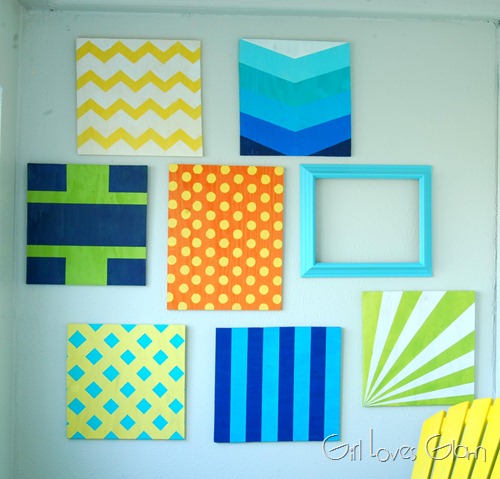
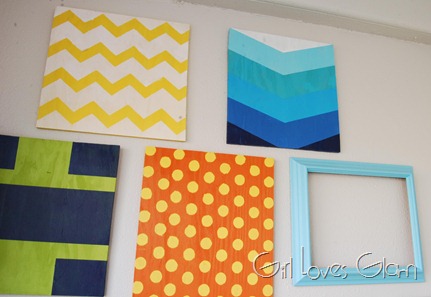
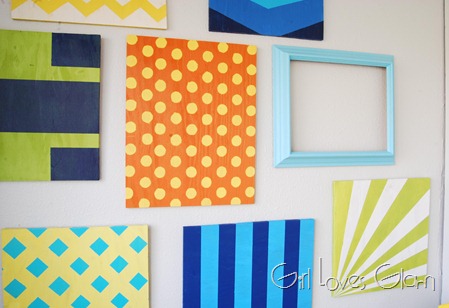
Can I get a hallelujah? I can’t even wait to show you the beauty that is my enclosed porch, BUT you will have to wait for the big, bad, reveal next week! Until then, here is my new gallery wall. Yep. I’m obsessed.

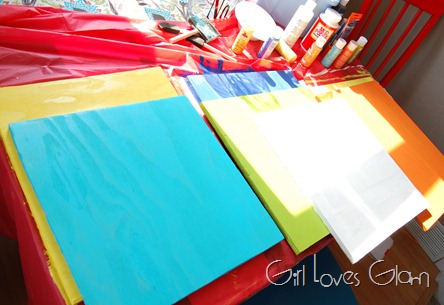
Want to know the best part? I didn’t spend much money on this at all. The wood was ALL scrap wood in my garage, and I used cheapo paint. Don’t judge, just embrace. If you want to make a gallery wall like this, all you need is some scrap wood, metal picture hangers, paint, and lots of tape! First thing is first. Paint all of your wood pieces a solid color. I did mine in several different colors.
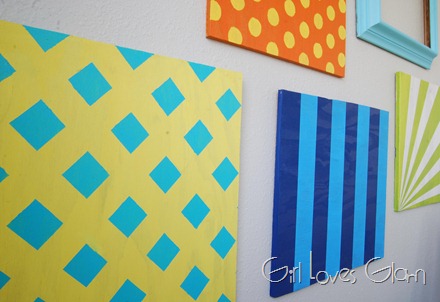
Stripes, Sunburst, Lattice, and Geometric Prints
All four of these designs are created basically the same way. Think of the design you want to create. Make little pencil marks where you want the tape to go, and tape away! Paint in between the lines.
Chevron Stripes and Polka Dots
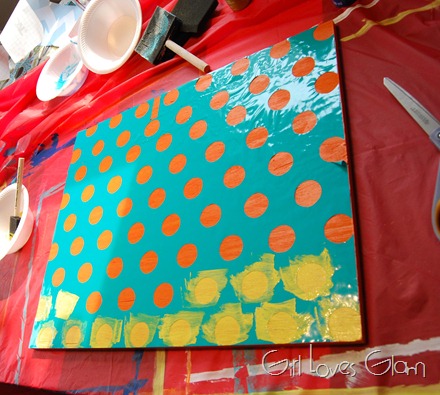
I used vinyl to achieve both of these looks. For the chevron, I cut out some zigzag strips and placed them on the board, equally apart. Then I painted in the free space. I will tell you this. When using vinyl as a stencil, it may be easier to use outdoor vinyl. The indoor vinyl doesn’t stick as well and the paint can bleed a little. For the polka dots, I cut out a polka dot pattern onto the vinyl. Instead of peeling off each individual dot, I peeled off the sheet with the missing dots. I didn’t have the same dimensions on my board as I did vinyl, so I cut up the vinyl and placed it where it needed to be on my board. I painted in the dots and peeled off the vinyl.
Ombre Chevron Print
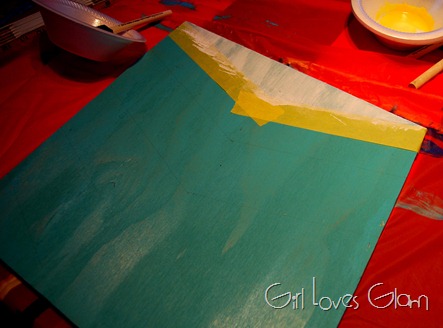
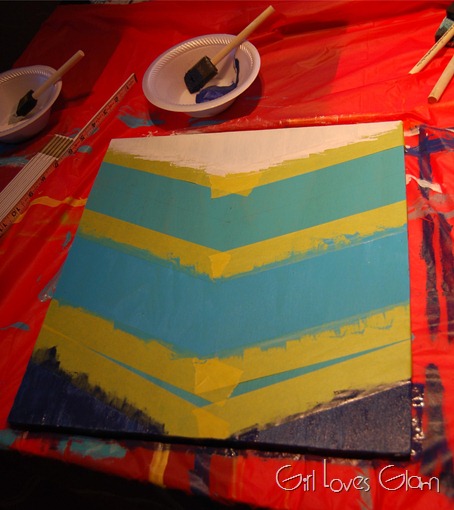
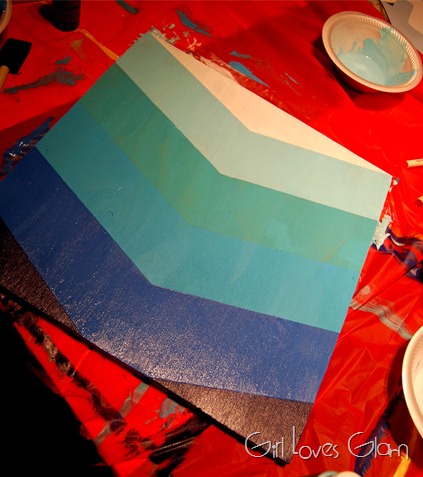
This one is a bit trickier than the rest, but let’s face it. It rocks. After you paint your entire board the color you want to base your ombre look on, measure out how wide your board is. Make a little mark in the center so you know where the center of the board is. Now measure out how long your board is and divide it by how many sections you want to have. Go along the edges and mark where you want your stripes to be and in the center, make equally spaced marks at an angle for the center of the chevron. Go with a ruler and trace all of your lines. Put tape on your top line and paint it white. If you have a little of the original color showing through, that is ok because it will all flow anyway.
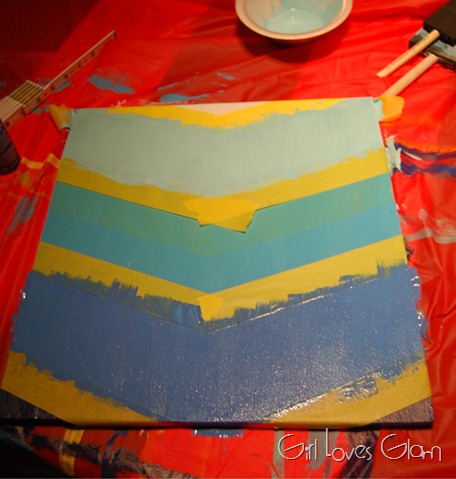
Now skip every other chevron stripe and tape the lines around them. Make a mental note of how dark you want each of your sections to be. For my ombre, I knew I wanted the look, but I wanted to use different tones too, so I had different containers of paint for my different shades. I only actually mixed color for one of the stripes. It gives it the ombre feel, without all of the mixing work. Paint the sections that you have taped off. Remember to leave a space for the original color that you painted your board.
Once your paint as dried, peel off the tape and tape your remaining sections. Paint those sections the appropriate colors. If you need to, mix two of the colors on either side of a section to create the perfect color for the stripe in between.
Let the paint dry, then peel off the tape. Isn’t it beautiful?!
I am so happy with how they all turned out. They each have an individual, unique look. I am also SO glad that I added the green to the mix. It needed another color in there to break things up. Green was just the color for that job. What one is your favorite?
The Chevron, The Ombre, The Geometric?
Or how about The Lattice or The Stripes?
The Polka Dots or the Sunburst?
What one do you love MOST?
I link to these great parties here
Due to the risk of stolen content, full posts are no longer available via RSS feed.
This post is via www.girllovesglam.com
This post is via www.girllovesglam.com


Colorful Corner Gallery Wall - Girl Loves Glam
Thursday 20th of November 2014
[…] I love this “You’re the bees knees” print that I found on Minted as well. They don’t have that print anymore, but you can see all of their artwork, HERE. I love old fashioned sayings like this and loved the idea of having it in our room. It is a good reminder that we love each other and that we actually LIKE each other too! The “you are my sunshine” art next to us was found on Etsy several years ago. We sang it to each other a lot when we were newlyweds. I love keeping a reminder in our room of the “good ol’ days”. My geometric art made from scrap wood is also in my gallery wall. It reminds me of our very first home and one of my very first big projects I shared on my blog! You can find the tutorial for them, HERE. […]
61 DIY Projects You May Have Missed on Girl Loves Glam - Girl Loves Glam
Saturday 10th of August 2013
[…] are still more of them left to be uncovered! So, let’s start. Shall we? Home Decor Pattern Gallery Wall | Houndstooth Stenciled Tile | Address Plaque | Pottery Barn Moss Letter | Painting Striped Walls | […]
Mandy @ Sugar Bee Crafts
Wednesday 5th of September 2012
Thanks for linking to Take-A-Look Tuesday over at Sugar Bee Crafts. You were featured today - twice! --Mandy, www.SugarBeeCrafts.com
Design Originals by KC
Tuesday 4th of September 2012
Love this... the sun burst is my fave too! Thanks for sharing your talent with us! Kathi
Cassidy
Tuesday 4th of September 2012
Love all the colors and patterns!Great way to dress up a wall for cheap. Awesome!!