This post contains affiliate links.
I don’t know if it is the sunshine, nature’s colors starting to bloom, or pulling out clothes that I haven’t been able to wear for a few months, but Spring has really made me excited to get dressed up again! I started getting in a bit of a slump towards the end of winter. One way that I love to add just a little more color in my life is through nail art. I have been obsessed with ruffian nail art ever since I saw it featured on the runways of fashion week last year.
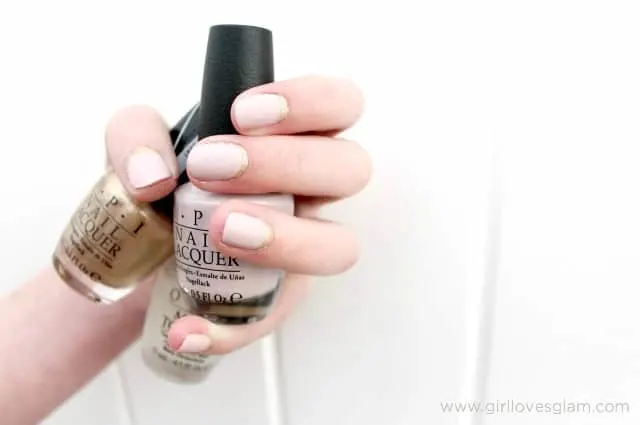
If you aren’t sure what ruffian nail art is, it is basically just a solid colored nail, but it has a little surprise right along the cuticles! There is a little line of color that goes along the cuticles and it just adds such a fun surprise to a boring manicure. I have seen it done in a lot of bold, contrasting colors, but I wanted to tone it down for a beautiful spring feel.
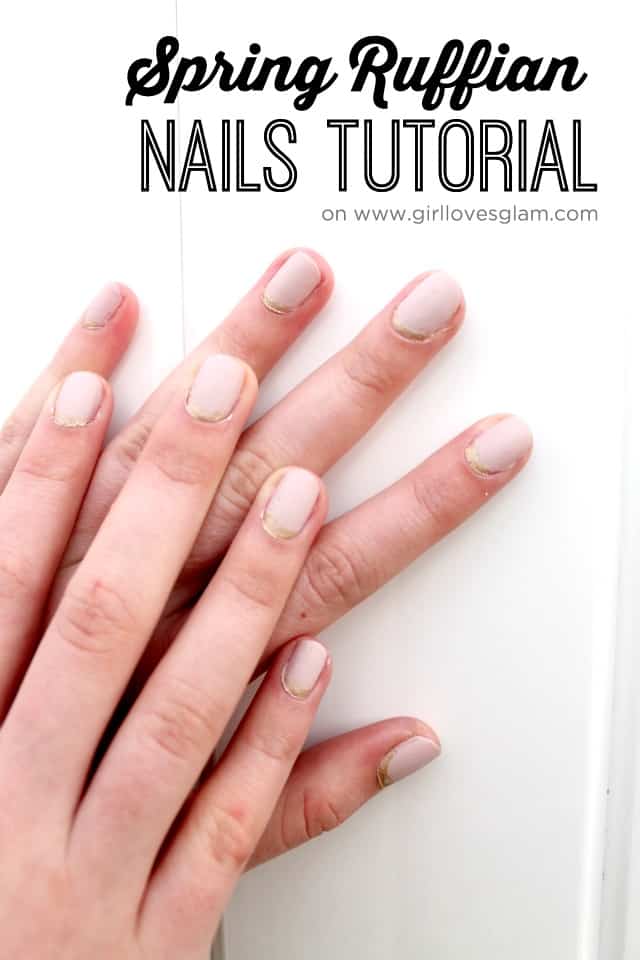
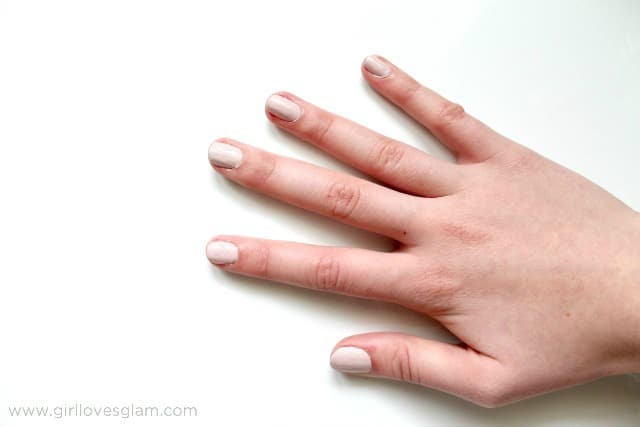
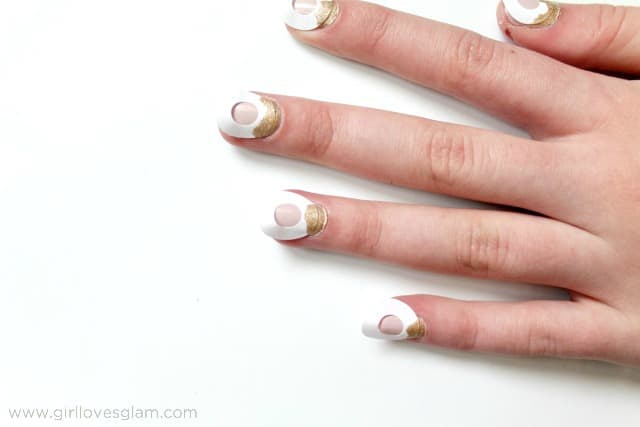
I have loved the muted nail trend happening right now, so for this manicure I chose to use a light pink polish with a metallic gold and then covered it with a matte finish top coat. It is soft and beautiful!
Here’s what you need to create this look too…
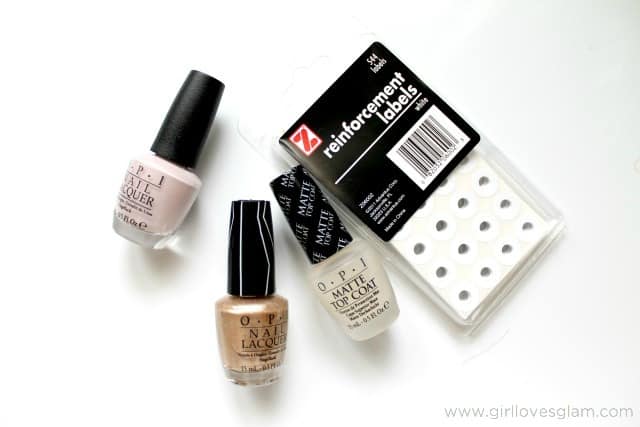
–OPI Don’t Bossa Nova Me Around polish (or another pastel color)
–OPI Love Angel Music Baby polish (or another gold color)
-OPI Matte Top Coat polish (or any top coat if you don’t want it matte)
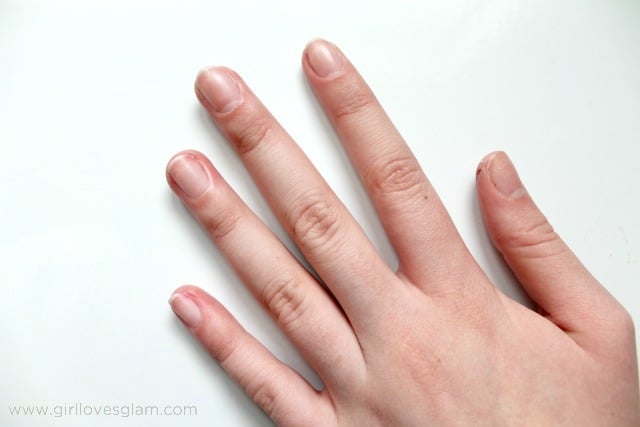
Start by filing your nails to the shape you want them and pushing back your cuticles. You could also wipe some finger nail polish remover over your nails to help remove any extra oils that may be on your nails. If you really want to prep the nails, you could use a base coat as well. I have mixed feelings about base coat. I use it when I do manicures at the salon, but I never use it on myself. I personally don’t see real results from using it.
Paint your nails with the pastel color with two coats of polish. Let this dry completely. You don’t want it even a little bit tacky for the next step. I recommend painting your nails with this color and taking a little break from the nail art and come back to finish it so that you won’t ruin the polish.
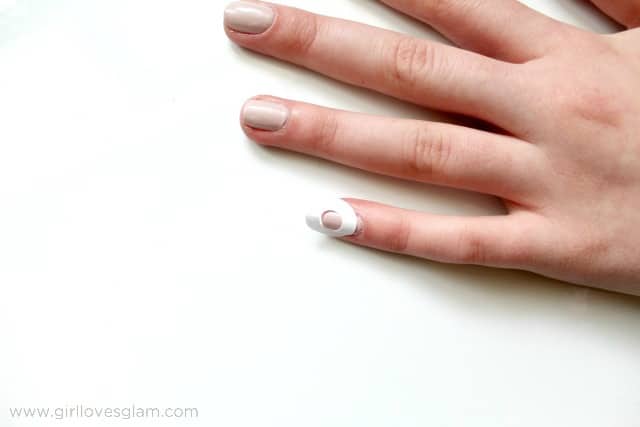
After your polish is totally dry, go back with the reinforcement labels and stick them onto your nails. This sticker goes right with the same shape as your cuticle. You will stick it on the nails just high enough to have a peek of the nail above the cuticle. This is where the other color will peek out.
Now go back and polish from the cuticle to the labels. Use a very small amount of polish so that the polish doesn’t get underneath the label. Peel off the labels after you have polished all of the nails.

Polish the nails with a top coat. You can polish it with a shiny one or a matte top coat.

I just LOVE how they turned out! I have tons more nail art tutorials in mind too! What kind of nail art do you want to see?
16 Refreshing Spring Projects I'm Obsessed With - Girl Loves Glam
Monday 21st of March 2016
[…] Spring Ruffian Nail Art […]
Favorite Spring Beauty Tutorials - Girl Loves Glam
Wednesday 13th of May 2015
[…] Spring Ruffian Nail Art– Pastel nail art goodness that is easy to do and looks gorgeous! […]
Aria
Saturday 18th of April 2015
It would be great to see a fourth of July manicure tutorial....but as it is not quite that time yet, I also suggest a coral heart tutorial.