

Remember how I told you I was pulling out all of my Halloween decor? Well, I did. Then I realized I am throwing a party on Saturday. I want party decor. Not Halloween decor. Therefore, my Halloween stuff is sitting on the table, waiting for Saturday to be over. I had another realization. I never showed you my super cute pillow either. I looooove it dearly.

To make one of your own, you need…
Pillow- I got mine on clearance at Ross
1 yard of orange fabric
Large RicRac- This just depends on how long your stem is
Glue Gun
Scissors
Rotary cutter
Mat

Either make your pillow, or buy your pillow. I cut the ugly button off of the center of mine.

Cut several strips of fabric. Mine were 2 inches wide. I cut them all the way across and then cut a few in half and in fourths so that I would have a few different sizes of rosettes.

This part is a little scary, because you realize just how many rosettes you are about to make. Luckily, they are easy to make while watching some good clean celebrity gossip shows.

I know that there are pretty much a million tutorials out there on how to make a rolled rosette, so I won’t totally bore you. If you know how to make them, skip this wordy step. For those of you who don’t… (Step 1) Lay your strip of fabric with the pattern or colored side down. (Step 2) Fold over one side and glue as you go. (Step 3) Fold over the other side and glue. This makes it so only the colored part of the fabric will show up as you roll. (Step 4) Fold one end of your strip, making a triangle shape. (Step 5) Hold the triangle piece and start twisting your long strip. (Step 6) Put a little dot of glue on the “center” of your flower, and place the twisted fabric on top. (Step 7) Repeat this over and over again until you are out of fabric. (Step 8) When you get to the end, fold the end of the fabric over on the back, and glue it in place. You are DONE!

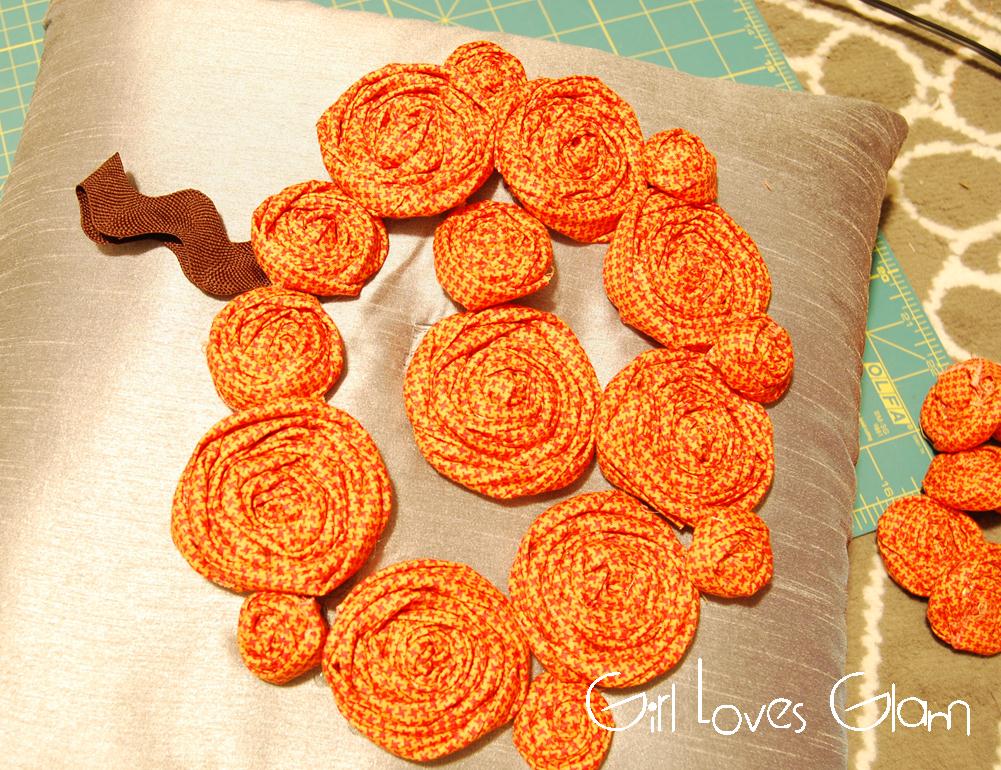
Make lots of rolled roses! I think my pillow has close to 40 of these suckers. Be sure to make them in different sizes. It makes it easier to create a pumpkin shape. Put them on the pillow, but don’t glue them.

Create a pumpkin shape with all of your rosettes. Don’t glue them down yet though.

Take your ricrac and see how long you want your stem to be. Keep in mind that your ricrac will be folded in half too so make it twice as long as you want your stem to be.

Place your stem where you want it to be on your pillow and glue it in place.
Now it is really time to get glue happy. I thought it was easier to glue the outside rosettes first and work my way in. Use the larger ones first so that the smaller ones can go where you have holes.
Glue all of your rosettes onto the pillow.
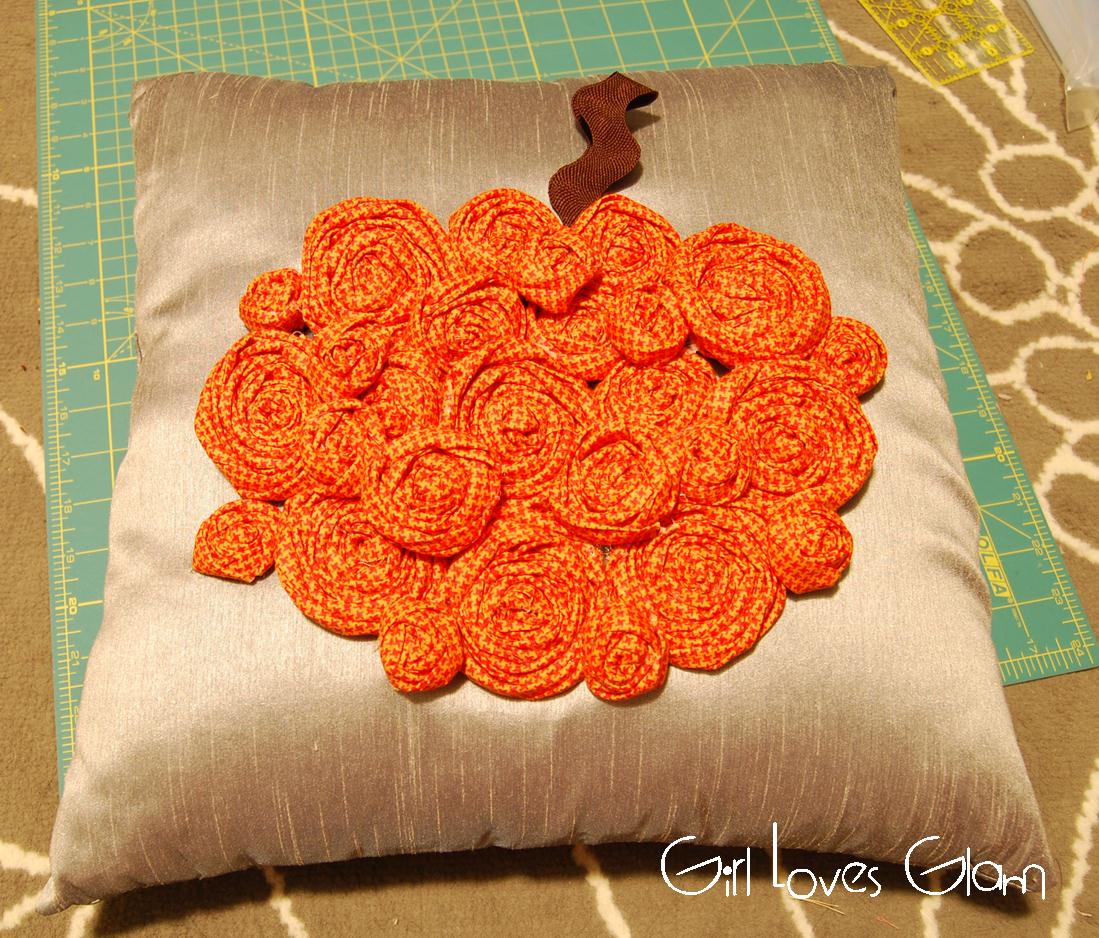
Go back through and be sure to glue down any spots that the rosettes may be sticking up a little bit.

Done! Isn’t it the cutest? I love that it instantly brings a taste of Fall into the room. The other great thing, is that it doesn’t look too Halloween. I can keep it up all season.

Now go make one of your own!
I link…
See Vanessa Craft
Six Sisters’ Stuff
Tatertots and Jello
Positively Splendid
I Heart Naptime
Skip to My Lou
Keeping it Simple
Brassy Apple
Today’s Creative Blog
Sugar Bee Crafts
Rae Gun Ramblings
Lil’ Luna
Organize and Decorate Everything
The DIY Dreamer
Snap
The 36th Avenue
Thrifty Decor Chick
Be Different Act Normal
Craftaholics Anonymous
Flamingo Toes
Eighteen 25
Due to the risk of stolen content, full posts are no longer available via RSS feed.
This post is via www.girllovesglam.com
This post is via www.girllovesglam.com
Easy Rosette Pumpkin Pillow Tutorial - Girl Loves Glam
Thursday 6th of October 2016
[…] I am excited to start doing something new around these parts each Thursday! It is going to be Throwback Thursday! There are so many of my old posts that have been lost and forgotten because of bad photography or just that they are really old posts, so I decided to bring one back from the dead each Thursday so that many of you who are new can kind of catch up! Since we are right in the middle of Halloween and Fall decor season, I decided to start things off with one of my favorite Fall projects… Easy Rosette Pumpkin Pillow Tutorial! […]
The Ultimate Round Up of 50+ Fabulous Pumpkin Crafts - Yellow Bliss Road
Tuesday 8th of April 2014
[…] Mod Podge Pumpkin Face Blocks Glitter Pumpkins 3-D Pumpkin Art Rosette Pumpkin Pillow Blinged Out Pumpkin Shabby Chic Pumpkin Twine Striped Pumpkin Dryer […]
Dominique
Monday 30th of December 2013
you can make all different types of fruit including apples and pears
12 Halloween Pillow Ideas - Uncommon Designs...
Saturday 28th of September 2013
[…] Girl Loves Glam created this Rosette Pumpkin Pillow and it is so much fun… love the silver pillow! […]
Amy
Saturday 13th of October 2012
Really cute pillow, I like your site too!