I am so excited to finally show you a little something I have been working on.. My office makeover! Slowly, this little townhouse we are renting is starting to feel like my very own space. I knew that I could handle renting for a while because I have killer tools to help me make any room look personalized, aka vinyl and my Silhouette! I have been dreaming about how to decorate an office one day and I finally got to do it!
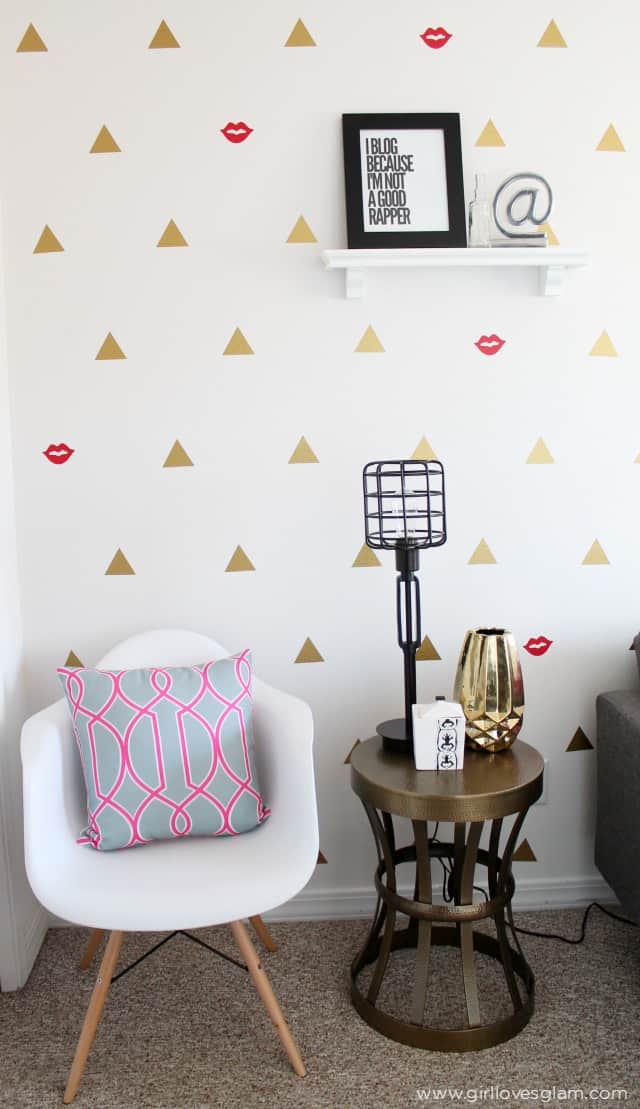
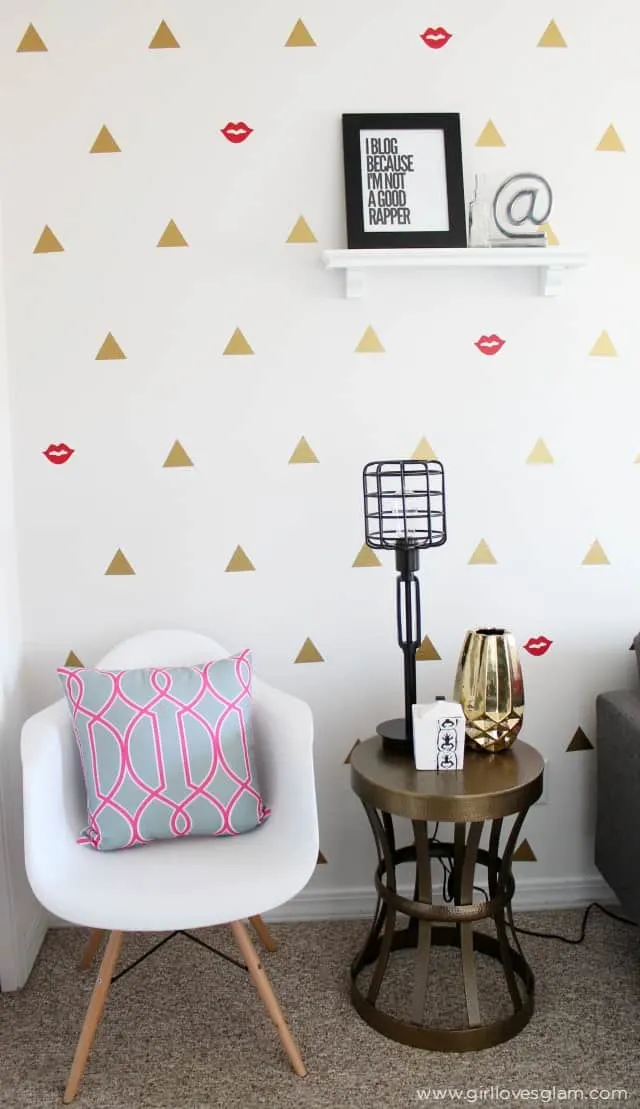
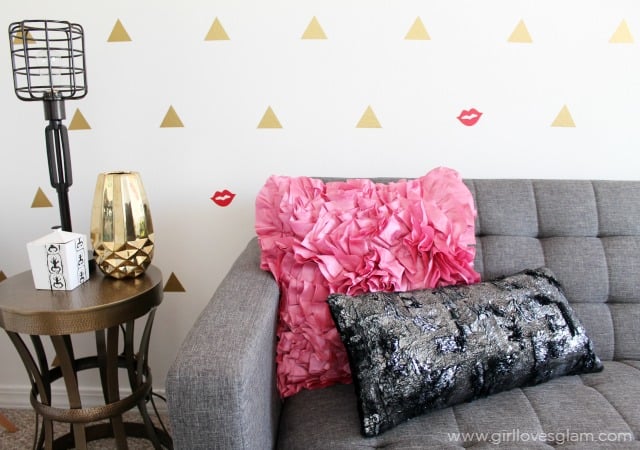
Ahhh! Could you just die over the wall?! I loved my gold geometric triangle accent wall in my old house and was really sad to say goodbye to it. I knew I wanted to bring it back to life, but I wanted it to be extra special. Because this wall is in a room that is specifically for my office, I could go a little more girlie with it. That is why I added the lips to it too! It is PERFECTION! I love the idea of adding a little surprise element to something that is typically pretty basic. This little area that is featured above is going to be the new spot where I will be filming my videos. It is the perfect backdrop!
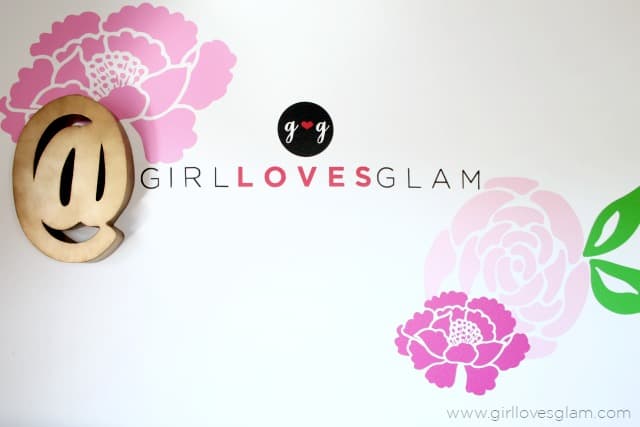
As if these walls couldn’t get any more amazing, you just take a glance across the room to find my logo with giant flowers adorning it. The big, fat @ sign tops it off just right. This sits right above my computer and is a really great reminder for me to look up and remember who I am and just how far I have come. This logo has a lot of meaning to me and really does represent a lot for me.
Now, you may be asking, how on earth did you do all of those things with vinyl and a Silhouette? The Silhouette Cameo can only cut 12×24 inches and those flowers are much bigger than that! Well, I am going to show you how I did the flowers, the logo, and the geometric wall so that you can turn your own boring walls into something special too.
Here is what you will need…
–Indoor vinyl (Expressions Vinyl has the best vinyl, biggest color selection, and crazy fast shipping)
-Silhouette electronic cutter
First, for the triangle wall, I did exactly what I did when I did my last triangle wall, so you can check out the post HERE for the instructions of how I did that. The only thing I did differently, was that I also cut out a sheet of red lips as well. I made them 3 inches wide as well. Both images can be purchased through the Silhouette store. I just placed the lips at random so that it would add a little quirky touch to the room. One thing I did differently when I was putting them on the wall was that I used a laser level in addition to the tape measure so that I could make sure everything was super straight without taking so much time.

It really is just about the greatest thing ever.
Now, for the logo wall!

To make that one, I purchased two different flower shapes that I really loved from the Silhouette store.

I made the flower as big as I could with half of the flower still fitting on the cutting mat. Then I made the pieces detach from each other by clicking right clicking on the image and clicking ungroup. This will separate each individual piece of the image. Now, highlight all of the pieces of the flower that aren’t fitting completely on the cutting mat and right click that section. Select “group” to have those pieces stick together and move it out of the way. Go over the the pieces that are on the cutting mat and highlight all of them and group them together as well. Now, cut your first piece of vinyl with the first half of the flower and then move that part over off of the mat to cut your second piece of vinyl with the other half of the flower. After they are cut, weed out the extra vinyl off of the vinyl paper and place transfer tape over it. Place one piece of the vinyl to the wall and apply it by scraping the transfer tape with a squeegee. After that piece is applied, go back with your second piece and place it right where it needs to be so that the flower doesn’t look broken up at all. With the flower that has the leaves, just treat this as a third section and make sure to cut it out in a different color.
For the logo, I just loaded the logo onto Silhouette Studio and had it trace the image. Then I figured out how big I wanted it to be and I ungrouped it and put each of the pieces together in the sections of what color I needed them to be cut out in. I have 3 colors included so I had to put them in 3 different sections to cut. Once everything was cut, I put them on transfer tape and carefully placed them on the wall using the laser level so that I was sure that it was straight. If you look very closely, it probably isn’t spaced apart EXACTLY the same as my logo between the different colored words because I eyeballed that part, but it is so close that it isn’t too noticeable.
![]()
![]()
Overall, I am really happy with how it all came together!
If you are in the market for a Silhouette, but don’t want to make a major investment, right now is the perfect time to try out the Silhouette Portrait machine. It is a little smaller than the Cameo, but you just learned how to cut out images much larger than the size of your vinyl so the size of the machine doesn’t really matter! Silhouette has an awesome deal on the Portrait that if you purchase one using the coupon code “OCTOBER”, you will get the Portrait for only $149.99 with free shipping and $200 worth of products to play with! Just go to SilhouetteAmerica.com/October to snatch that deal up! Offer ends October 31!
Come back on Friday to see the rest of the room and get all of the details about the other items in the room that you haven’t seen yet!
Office Reveal: Kate Spade Bow Inspired - Girl Loves Glam
Friday 25th of March 2016
[…] in our townhouse, but I was excited to design another space in a new house. I wanted it to still feel like my old office in some ways, but a new space at the same time. I have always been in love with the Kate Spade bow […]
Bright and Happy Little Girl Bedroom Reveal - Girl Loves Glam
Wednesday 24th of February 2016
[…] paint in this rental home so we had to come up with another solution. I took inspiration from my triangle and lips wall I had in my office in our last house and decided to give it a girlie twist. I told Harper that we were doing polka […]
Emily @ Small Stuff Counts
Thursday 30th of April 2015
Hi Mckenzie, so glad I stumbled on your blog today! What a totally glam office! I have future plans to do some sort of vinyl pattern on my craft studio wall, so thanks for the inspiration today. Just followed you on Insta and FB....looking forward to getting to know you and your blog!
Silhouette Cyber Monday Week DEALS! - Girl Loves Glam
Wednesday 3rd of December 2014
[…] Remember that killer Silhouette Portrait giveaway I hosted last week? Well, if you entered it you already read all about my love of Silhouette. But in the off chance that you didn’t see it, I am confessing my love for them again. I purchased a Silhouette Cameo 2 years ago on the Black Friday deal and my crafting life has never been the same! This machine can cut nearly anything, I swear. I have been able to design so many fun projects and have created some of my favorite spaces because of that machine… like my modern, girlie office. You can find the post all about my office, HERE. […]
Delecta
Sunday 23rd of November 2014
first things first, this is amazing!!!!
Secondly, I knew this is exactly what I wanted for my small foyer area as soon as I found you on Pinterest. Question...how much vinyl did you purchase to complete your office. Our foyer is tiny and I don't want to overpurchase. I would love to know. Thank you so much!!!
McKenzie
Sunday 23rd of November 2014
I used 3 or 4 sheets of the 24x12 sized vinyl! Thanks for your sweet comment!