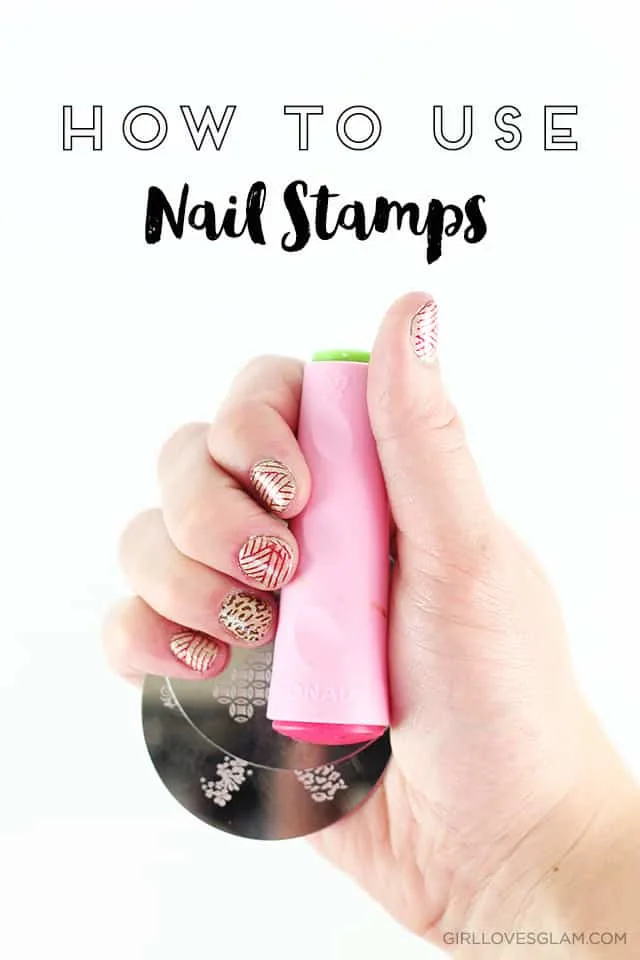
I always have the hardest time coming up with things for my husband to get me for Christmas, but this year I had a great idea. I wanted a nail stamp kit! I have learned some great tips on how to use nail stamps.
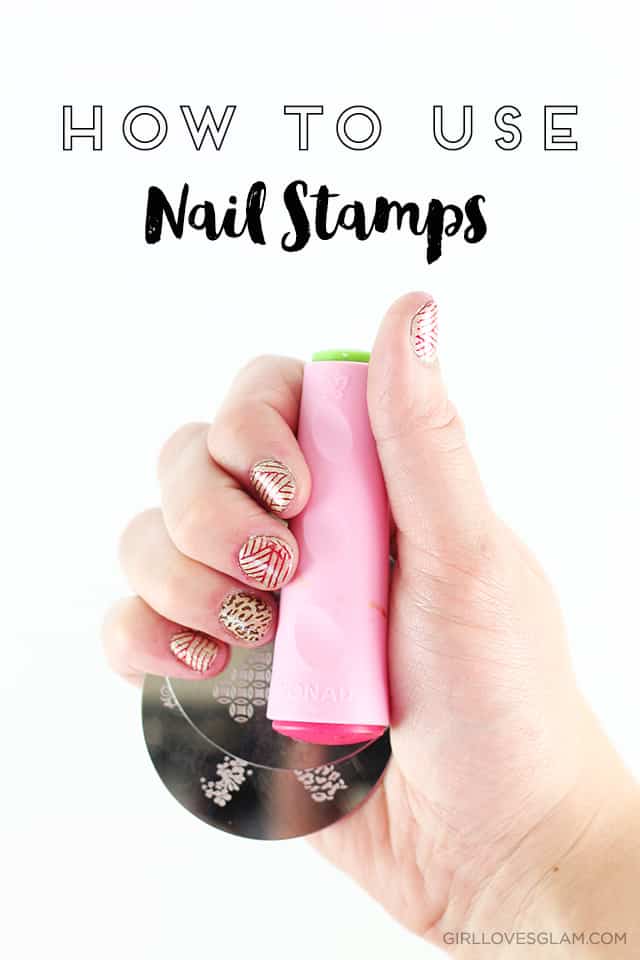
First of all, some of you may be wondering what nail stamps are. Nail stamps are little plates that have different designs on them that you can stamp onto your nails. They give you awesome nail art on your nails, without having to be an artist.
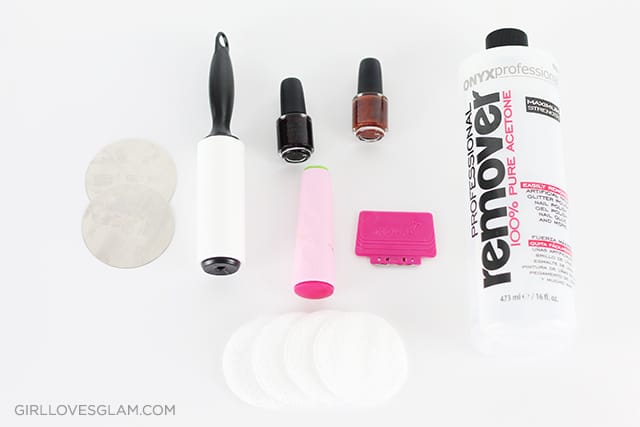
This is what you will need to do nail stamps. These contain affiliate links…
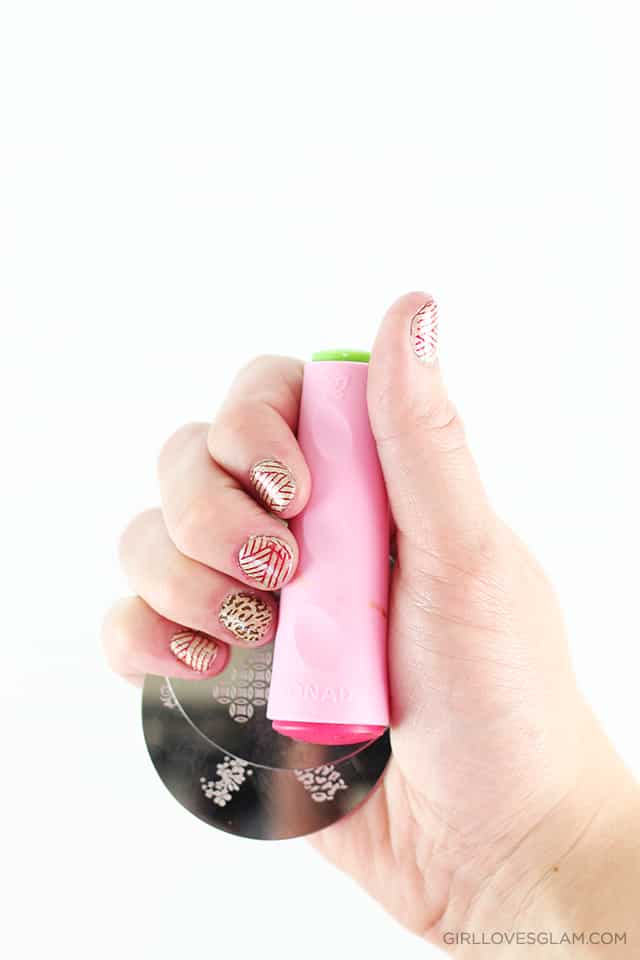
Nail stamp plates. I ordered the pack of 100, but they also come in packs of 10 and 30 as well.
Nail stamper and scraper. These are nicer ones, but they are so worth it to spend a few dollars more on a nice stamper that is soft and doesn’t feel dry.
Nail polish. Colors that you want you nails to be, the colors for your nail stamps, and a top coat.
Page protector
Cardstock paper
Cotton rounds
Nail polish remover
Lint roller
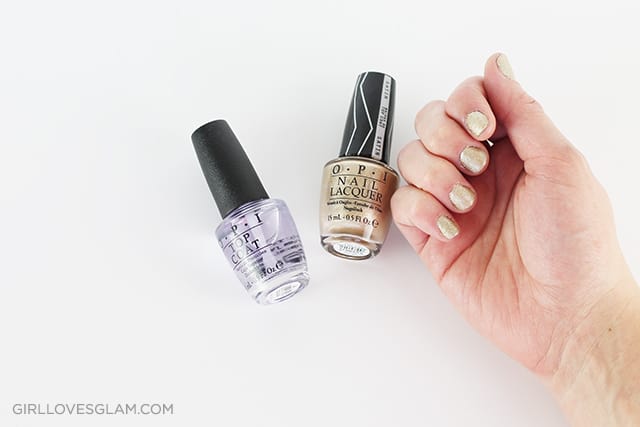
Before you get started, give your nails a good manicure so they look nice. File your nails and clip your cuticles so they can be prepped for fabulous nail designs. Paint your nails with the polish you want underneath your nail stamps. Paint your nails with a top coat as well and let it dry.
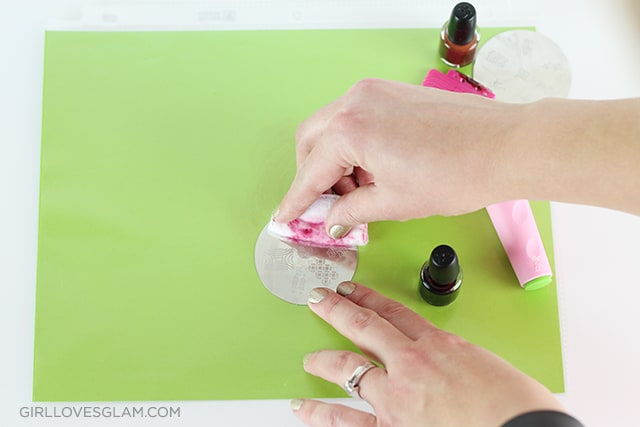
After your nails have dried completely, put polish on the stencil you want to put on your nails. Make sure that polish gets into all of the grooves of the stencil. I do all of my stamping on top of my page protector with the cardstock in it. It helps keep all of the mess on a surface that can be cleaned up easily.
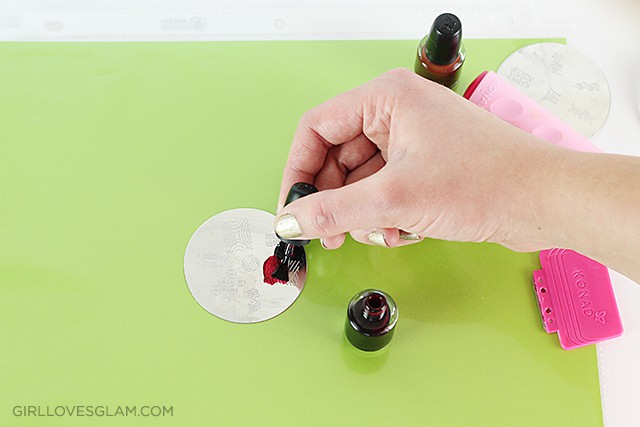
Scrape off the excess polish with your scraper, leaving only the nail stamp design on there. Use firm pressure to get this. If you don’t get enough off, you will get extra polish on your stamp and it won’t work. This may take a little practice, but it isn’t too hard.
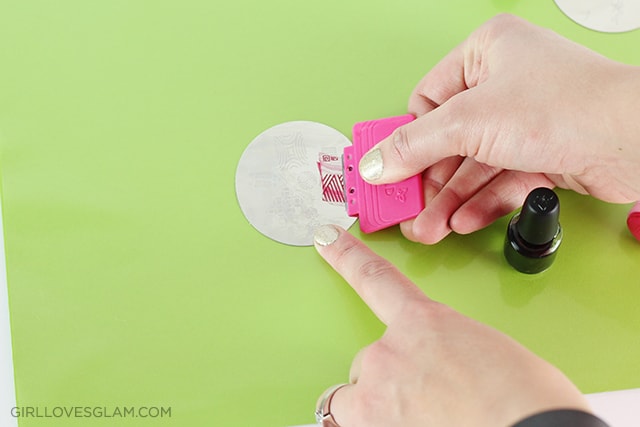
Take the nail stamper and press it down onto the top of your stencil. Make sure that all of the stencil gets onto the stamper.
Before you put the stamp on your nails, make sure it all got on your stamper and that it doesn’t have any smears on it. This is exactly how it is going to look on your nails. If it doesn’t look right, start over again with the stamp. If it does look good, place it onto your nail and roll from one side of your nail to the other. Make sure not to make the stamp go over a section more than once. This also might take some practice, but it gets easier! Don’t worry about getting polish on your skin. It is much more important to get the stamp onto your nails because you can go back and clean up the polish on your skin later. Also, if your stamp doesn’t work well, you can go use a little nail polish remover to quickly swipe over it and take the polish off. Since you already put a top coat on, it shouldn’t take off the nail color. Just make sure you put more top coat on before you stamp your nail again.
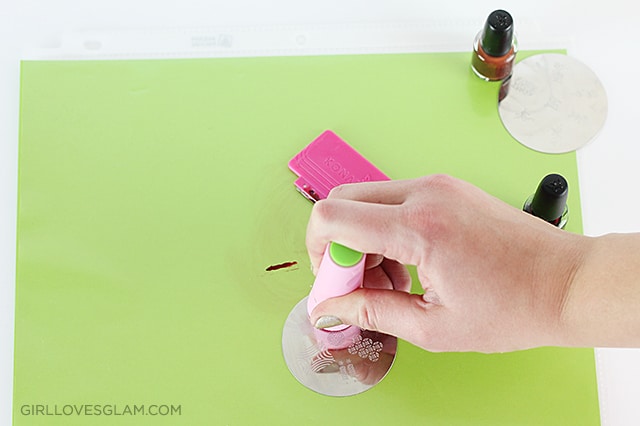
Before you move onto the next nail, wipe off the stencil with some nail polish so that it is nice and clean for the next nail.
Don’t use nail polish remover on your nail stamper. Nail polish remover will dry out the stamper. You do need to get the excess polish off of it, so take a lint roller and just stamp the lint roller with the nail stamper and the polish will come right off onto it.
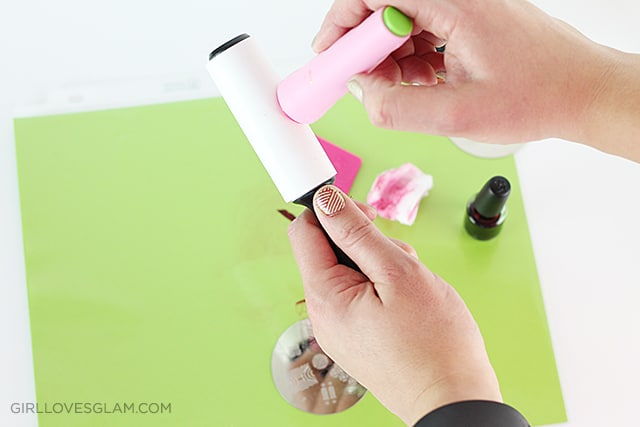
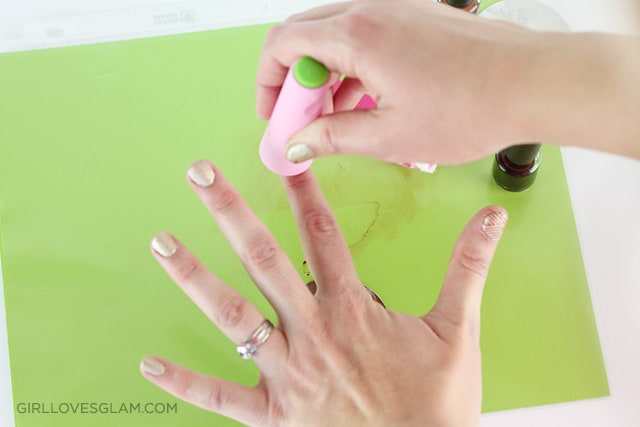
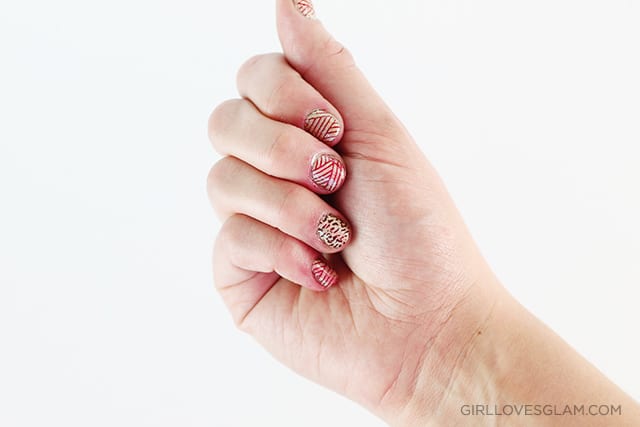
Continue stamping your nails until you have all of your nails stamped the way you want them. Notice that I have stamps all over my fingers still. Like I said, we will clean that up in a minute!

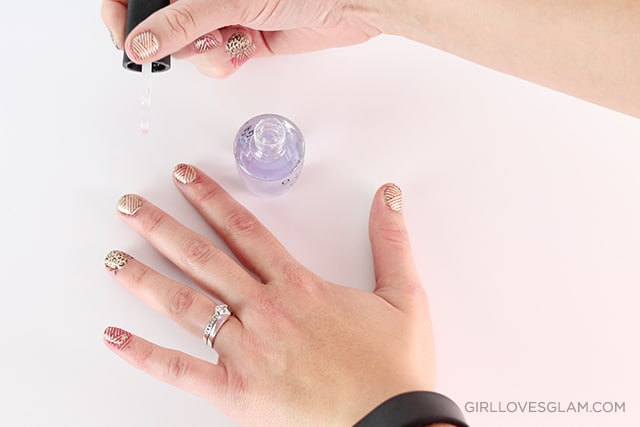
Put top coat onto your nails so that the stamp designs are all protected.
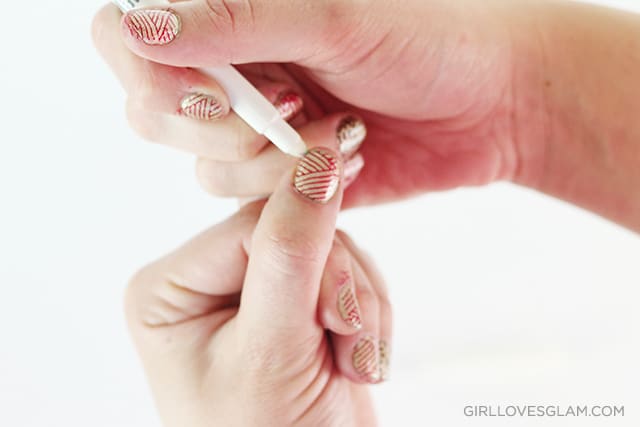
Take your nail polish remover pen and go around all of your nails to clean up all of the nail stamps that got on your skin. These nail polish remover pens are amazing and perfect at this job!
Now you have beautiful stamped nails! They are so easy to do and are really fun to play around with.
I have made it my own little tradition to stamp my nails while I am watching The Bachelor. It has been a fun, creative outlet while I am enjoying guilty pleasure TV.
So, do I have you convinced to try out nail stamps too?
Brenda Brown
Friday 20th of April 2018
Thanks, for the info on how to apply the stamping process to my nails. I just found by luck looking at the different nail design and saw that, it came from stamping, so now I have another form of designing my instead of just painting them.
Aria
Wednesday 10th of February 2016
Wow, that looks so easy! What nail polish remover pen do you use? I bought a Sally Hanson one but it dried out, and I didn't like the quality.
McKenzie
Wednesday 10th of February 2016
I have used a few. I would recommend buying one that isn't a lower end one. The one I linked to is a nice one. I have also tried one from Sally Beauty and it was great!
Katie
Wednesday 10th of February 2016
Thanks for the lint roller tip! =) I got a stamp set for Christmas but can only stamp two nails because I get nail polish remover and cotton fuzz on my other painted nails and get frustrated. I'll give it another shot =)