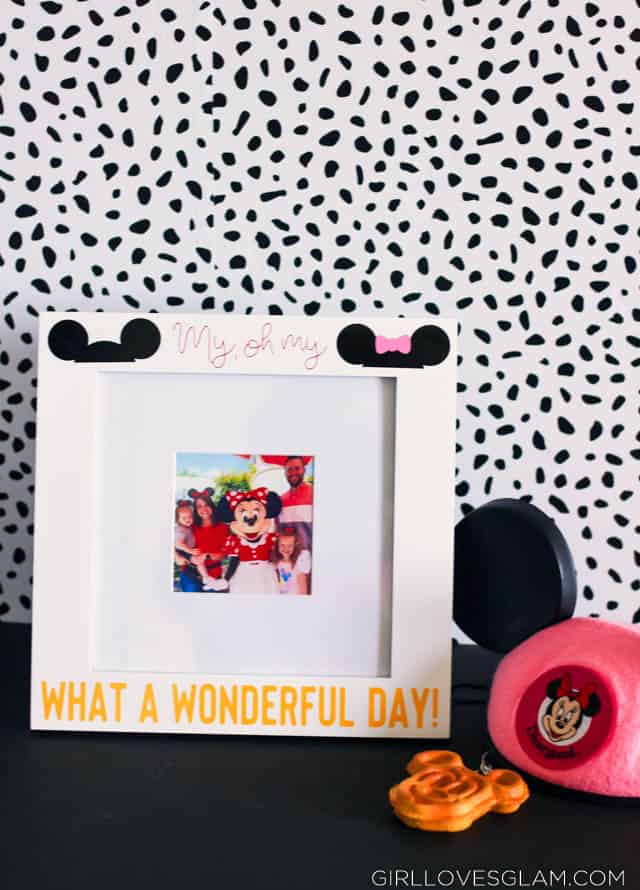
We just got back from a trip to Disneyland and it was just the best! I am pretty sure I was the most annoying Instagrammer on my personal account because I posted all of my photos so they could be added to my photo books. But I also wanted to be able to see a photo to remind us of our trip all of the time. I had looked at picture frames at the Disney store, but they were just too pricey! Thankfully with a little vinyl and my Silhouette Cameo, I could whip up something I like even better than anything I saw at the Disneyland shops!
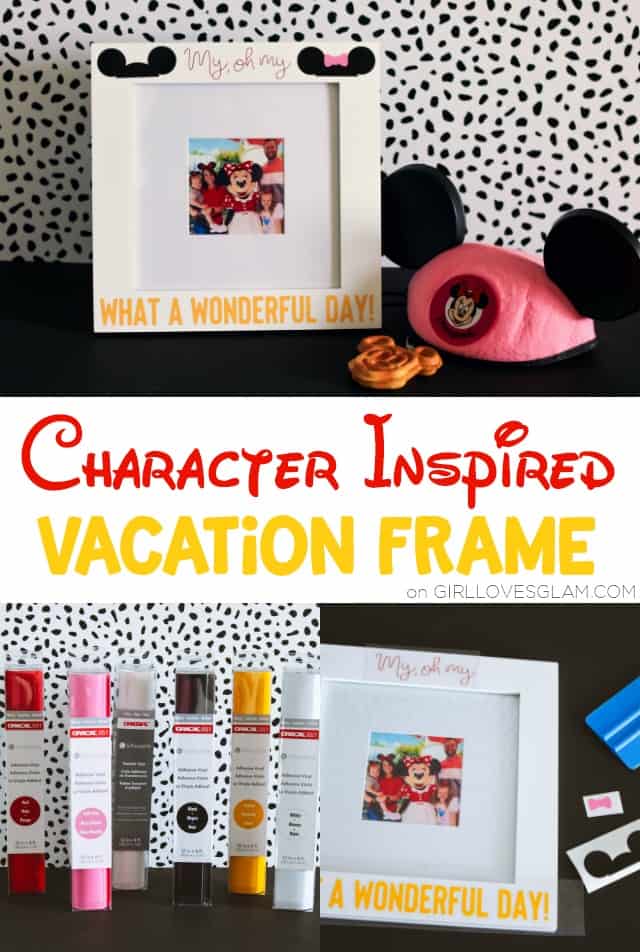
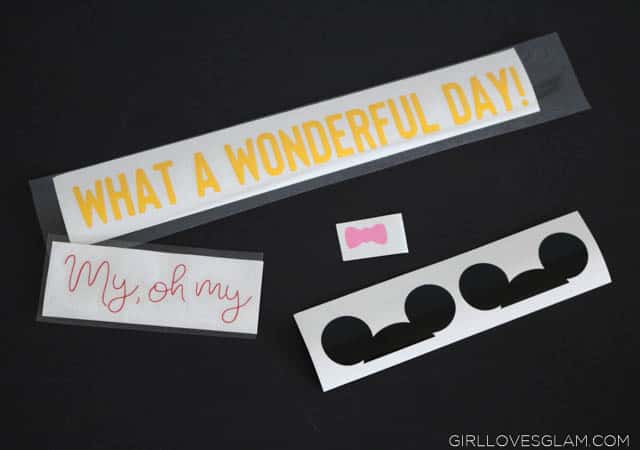
I love the song, “Zip-a-dee-doo-dah” because I grew up watching a Disneyland sing-a-long that had that song in it. To me, no song screams Disneyland more than that one! I knew that the lyrics, “My, oh my what a wonderful day” would sum up our trip perfectly! To make this frame, I used…
-White picture frame from Walmart
-Silhouette Cameo (use code GLAM for discount!)
-Oracal 651 Silhouette vinyl found at JoAnn
First, I wanted to find the perfect fonts to use for my frame. I love that Silhouette Studio has font bundles that they sell in their store because you know that those particular fonts will look good together. I went with the Floral Thunder font set in the Silhouette Store. I used both the Floral Thunder Sans and the Floral Thunder Alternate fonts.

How to Create Mickey Head on Silhouette Studio
Next, I made the Mickey hat shapes. To do this, I made one large circle. To make the circle stay a circle, hold down the shift button as you use the ellipse tool. I made a smaller circle for the ear and then duplicated it so that both ears would be the exact same size.
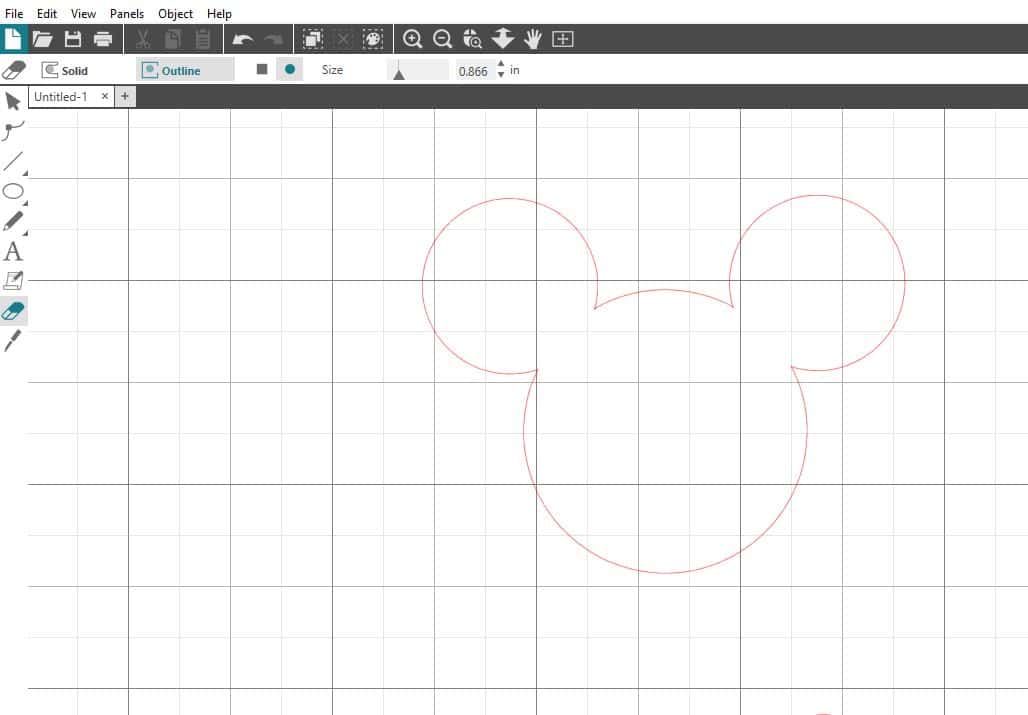
Next, I grouped all three of the shapes together. Then I took the eraser tool and got rid of the extra circle spots. Lastly, I made a line just below the ears and used the eraser tool to get rid of the bottom part of the large circle. I duplicated the shape so I could have both a Mickey and a Minnie set of ear hats.
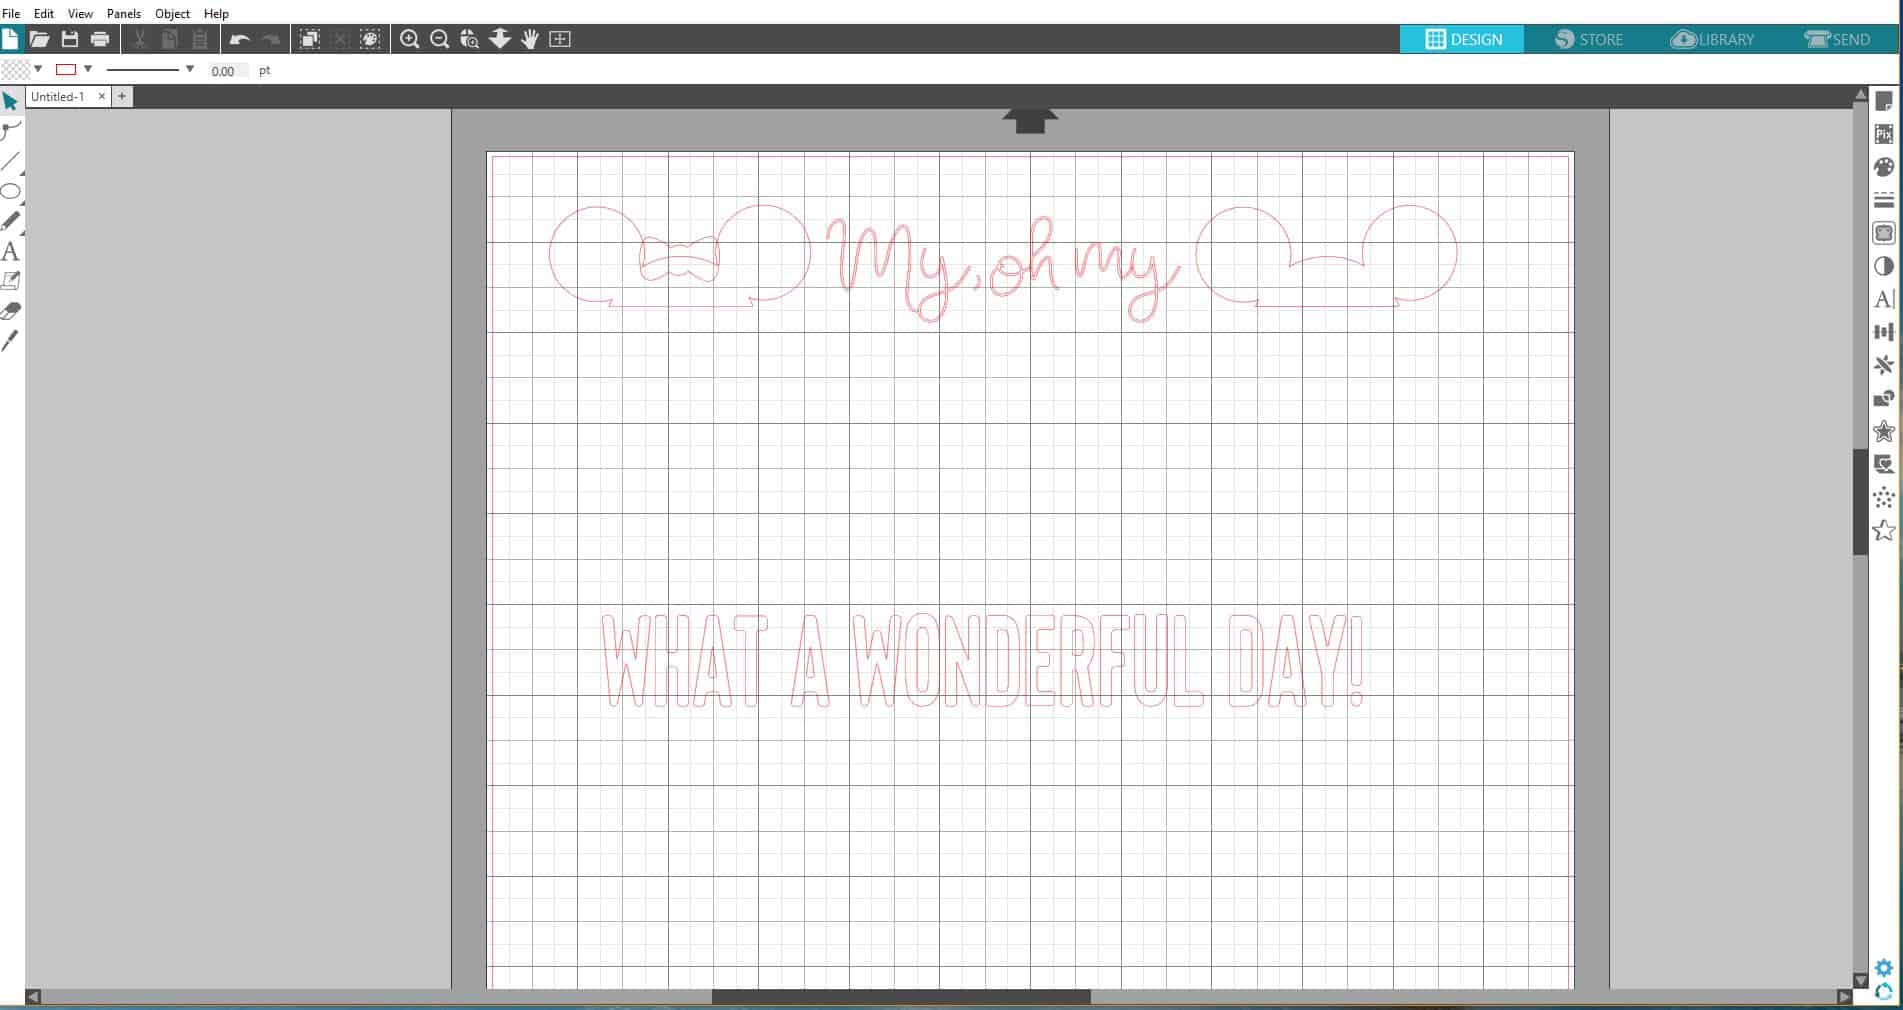
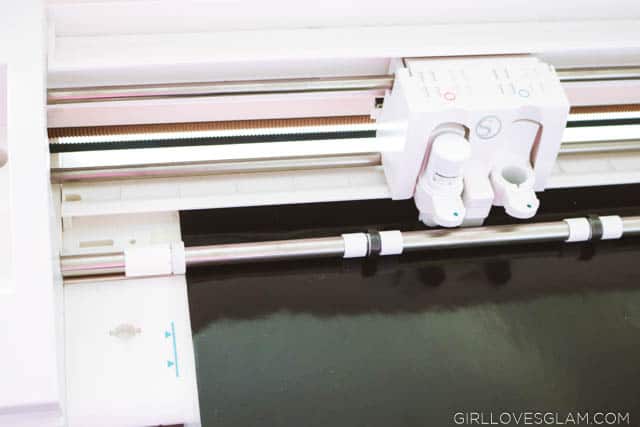
I measured my frame to see how big I wanted everything to be and laid it all out on my Silhouette Studio. Once I had the sizes correct, I pulled pieces off of the mat and was able to cut each design out in the color they needed to be.
Applying Vinyl to Picture Frame
After cutting all of the vinyl out, I weeded the extra vinyl off of them and added transfer tape to the backs of them.
Using transfer tape is essential for placing fonts on anything! It helps keep the words together and allows you to line everything up before putting it into place.
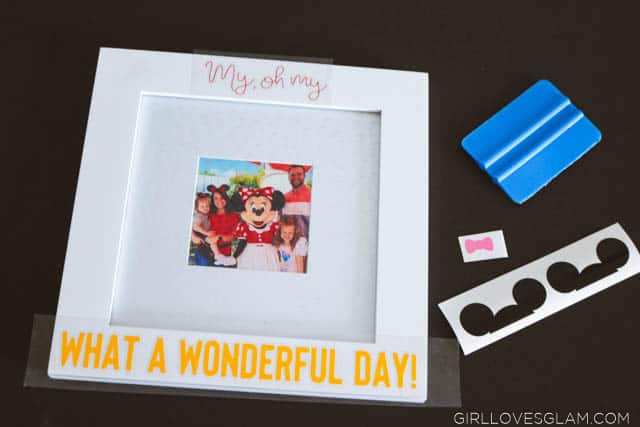
Once I placed the fonts where they needed to be, I scraped them on really well with my scraping tool. After the words were placed, I added the ear hats to both sides of the top of the frame.

I love that we are able to remember our fun Disneyland vacation by having this photo up to see! It captured a fun moment that we won’t ever forget!
There are so many fun projects that you can make with your Silhouette Cameo! I would love to hear what things you have made with yours!